-1.png?height=120&name=formrun_logo%20(3)-1.png)
How to view the board screen, how to edit the status, and how to reorder cards.
Overall View

Edit Status
How to Edit Status
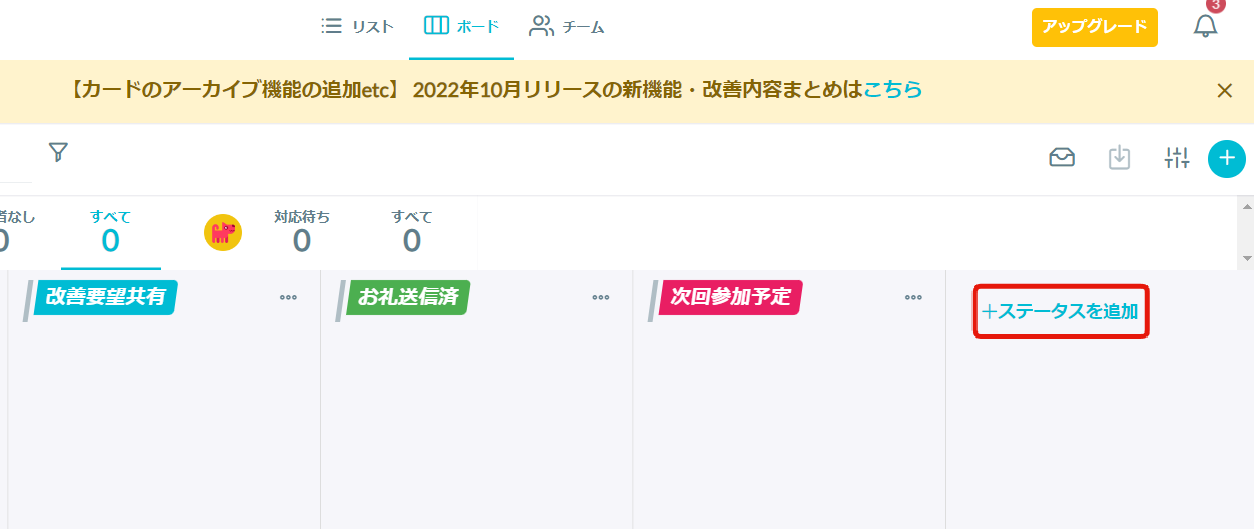
- Adding/Editing New Status
- Scroll to the rightmost status on the board view and click "Add Status+"
- Select a status color
*Please note that you must select a color to add a status.
- Changing/Deleting Existing Status Names/Colors
- Click the "..." next to each status
*You can choose from 18 different status colors
*You can also do this from "Settings > Status Settings."
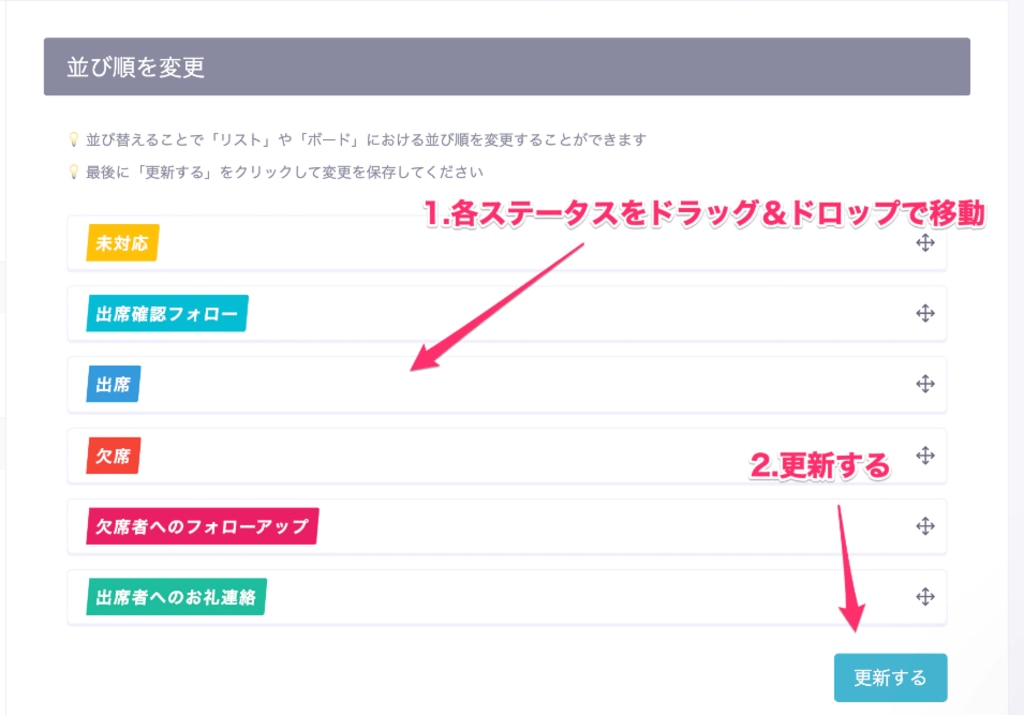
1. Click the "..." next to each status
2. Click "Change Order"
3. Drag and drop each status to rearrange
4. Click "Update"
- Status displays the number of cards under that status.
- Due to pagination, it only loads card counts for the latest 30 fields.
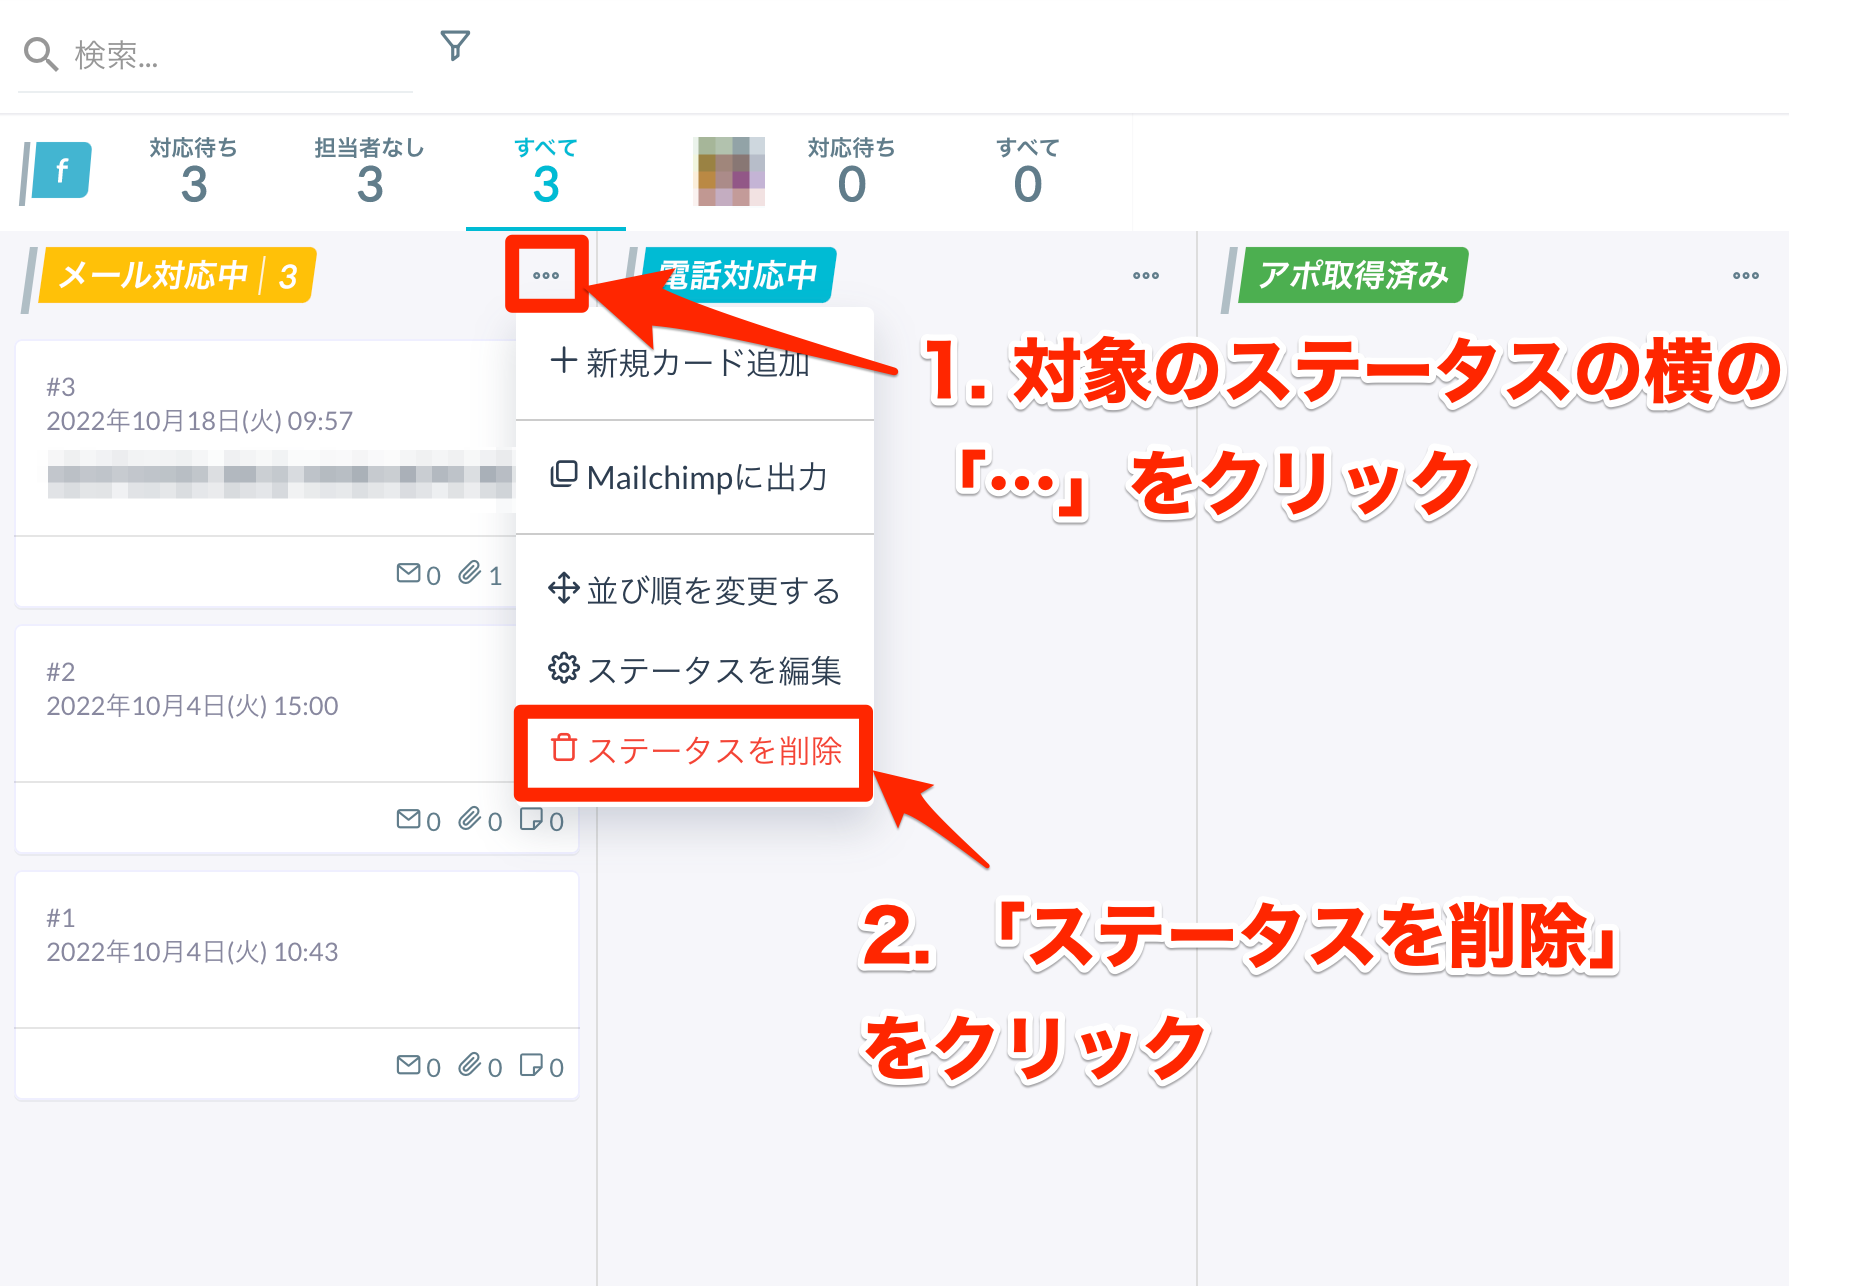
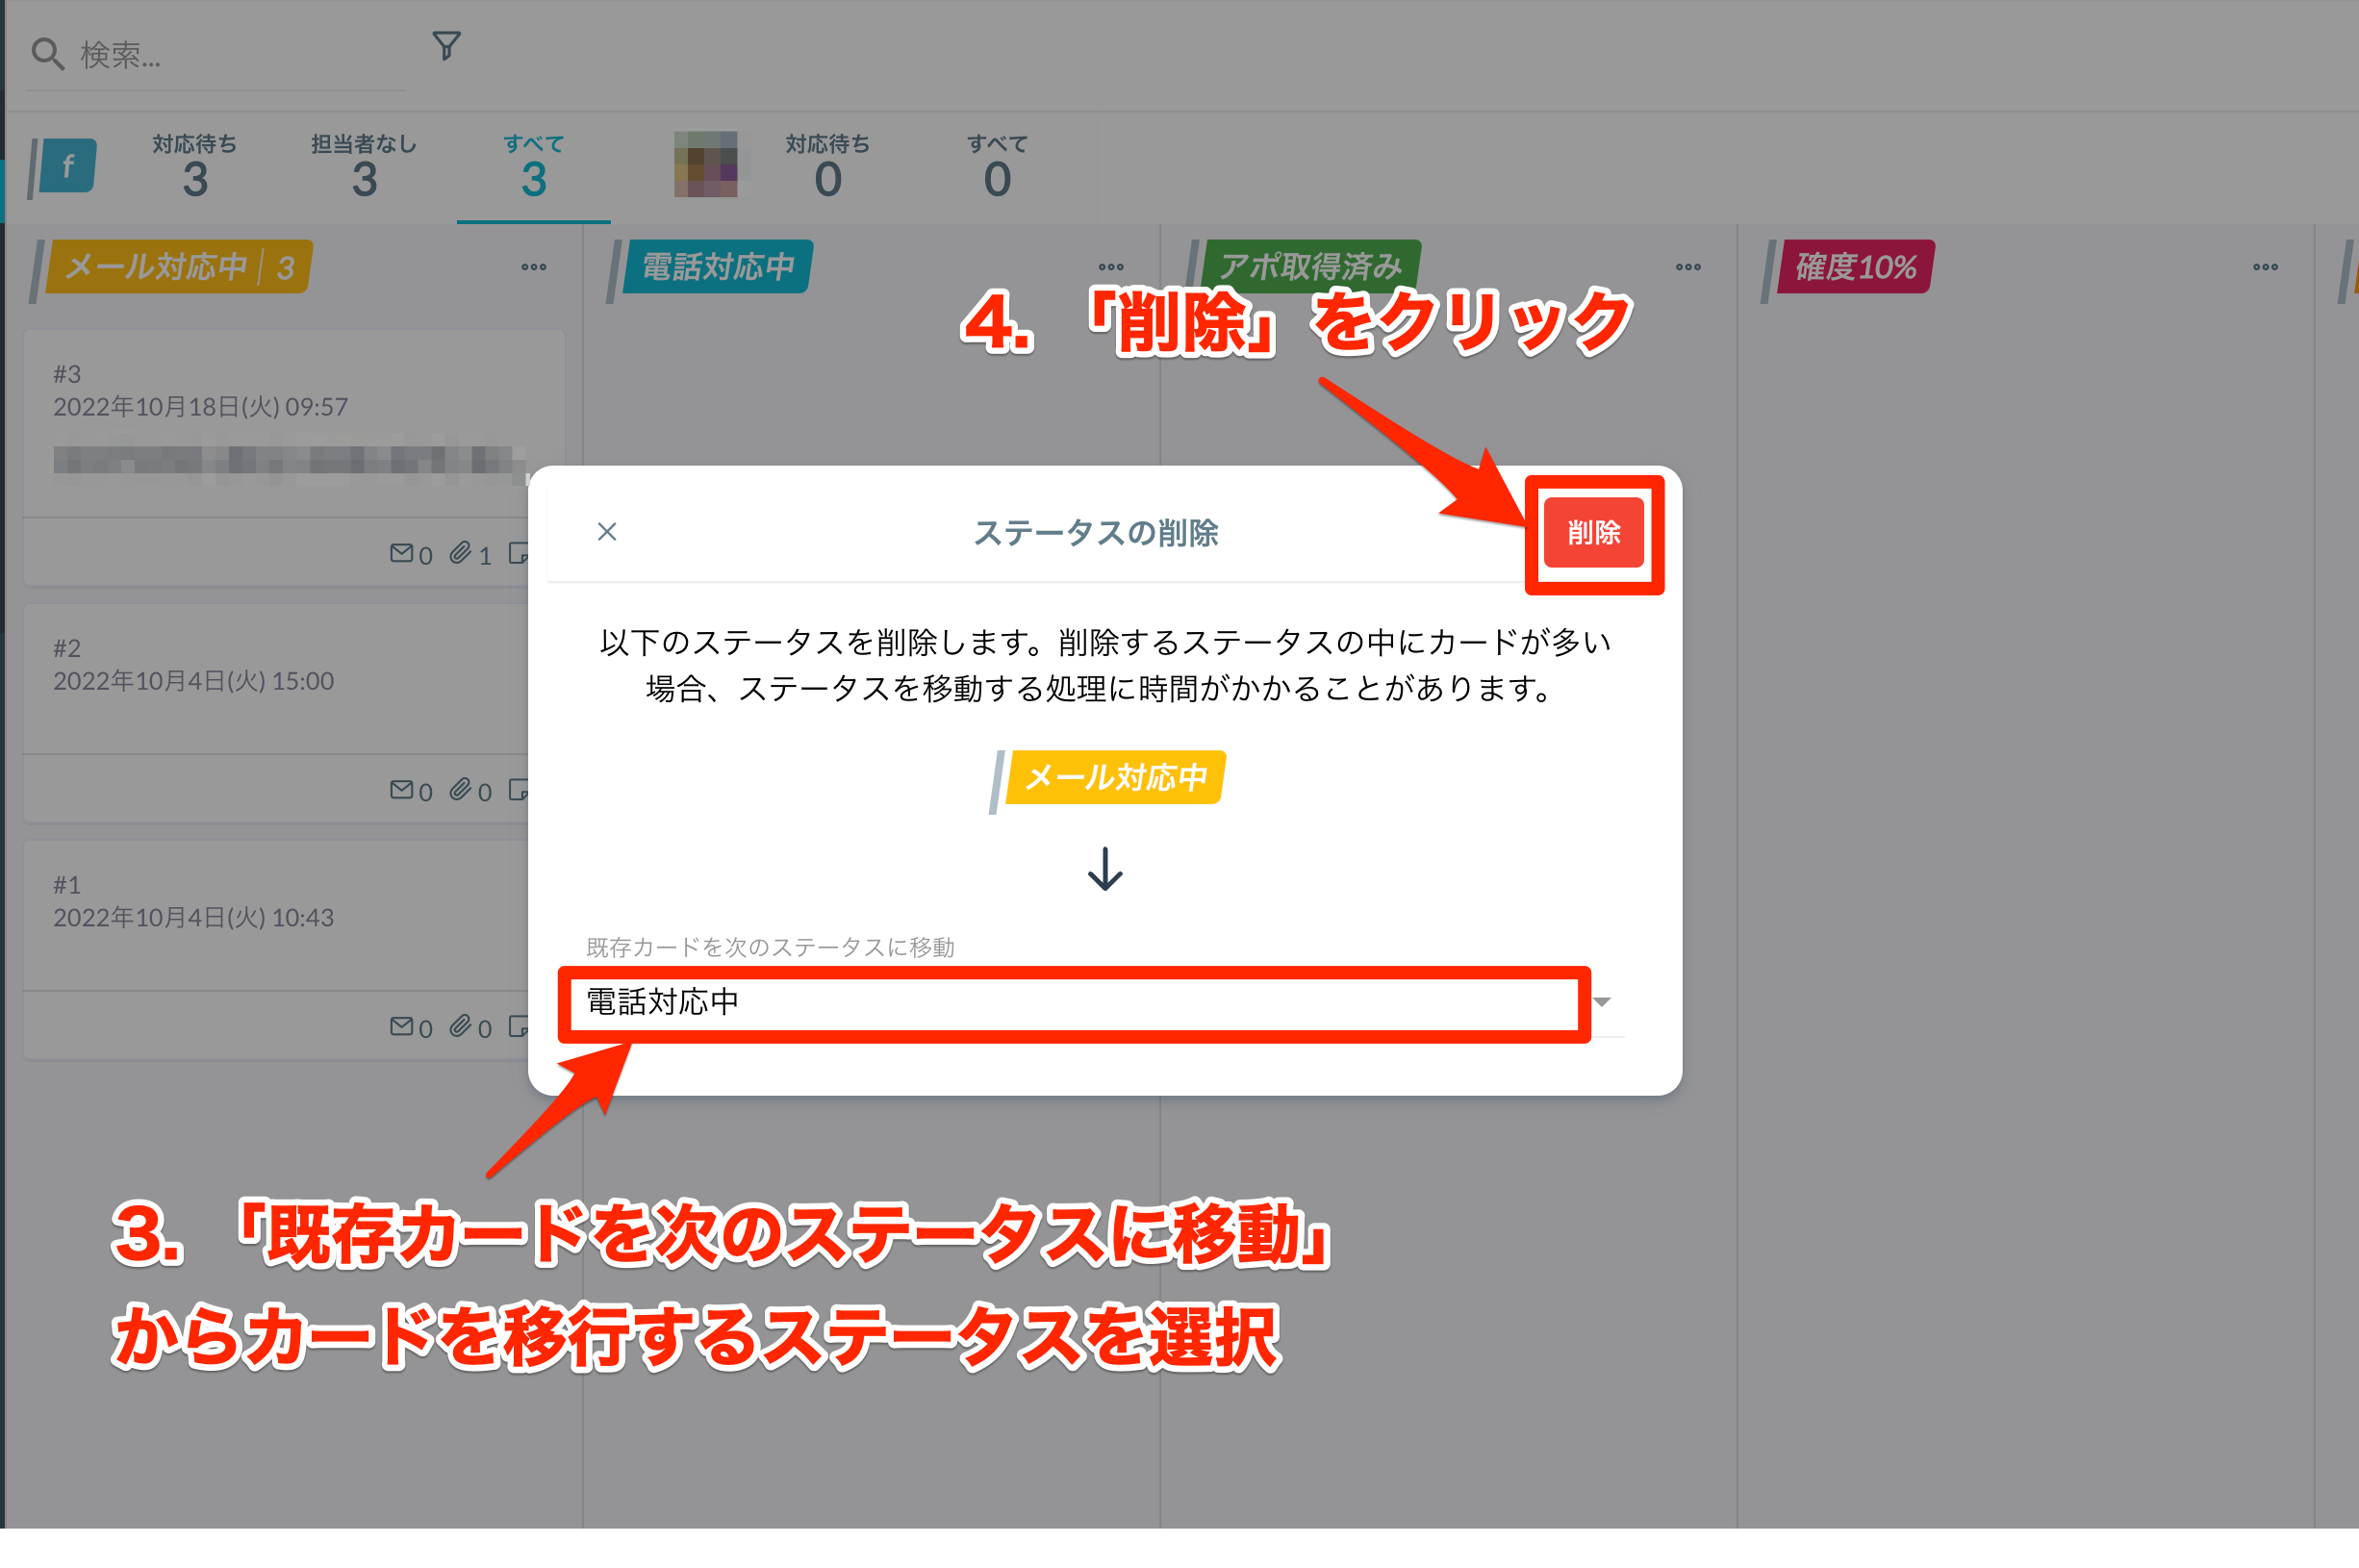
Delete Status
- Click the "..." next to the target status
- Click "Delete Status"
- (If there are cards in the status) Select the status to move the existing cards to
- Click "Delete"
When Deleting a Status with No Cards Inside
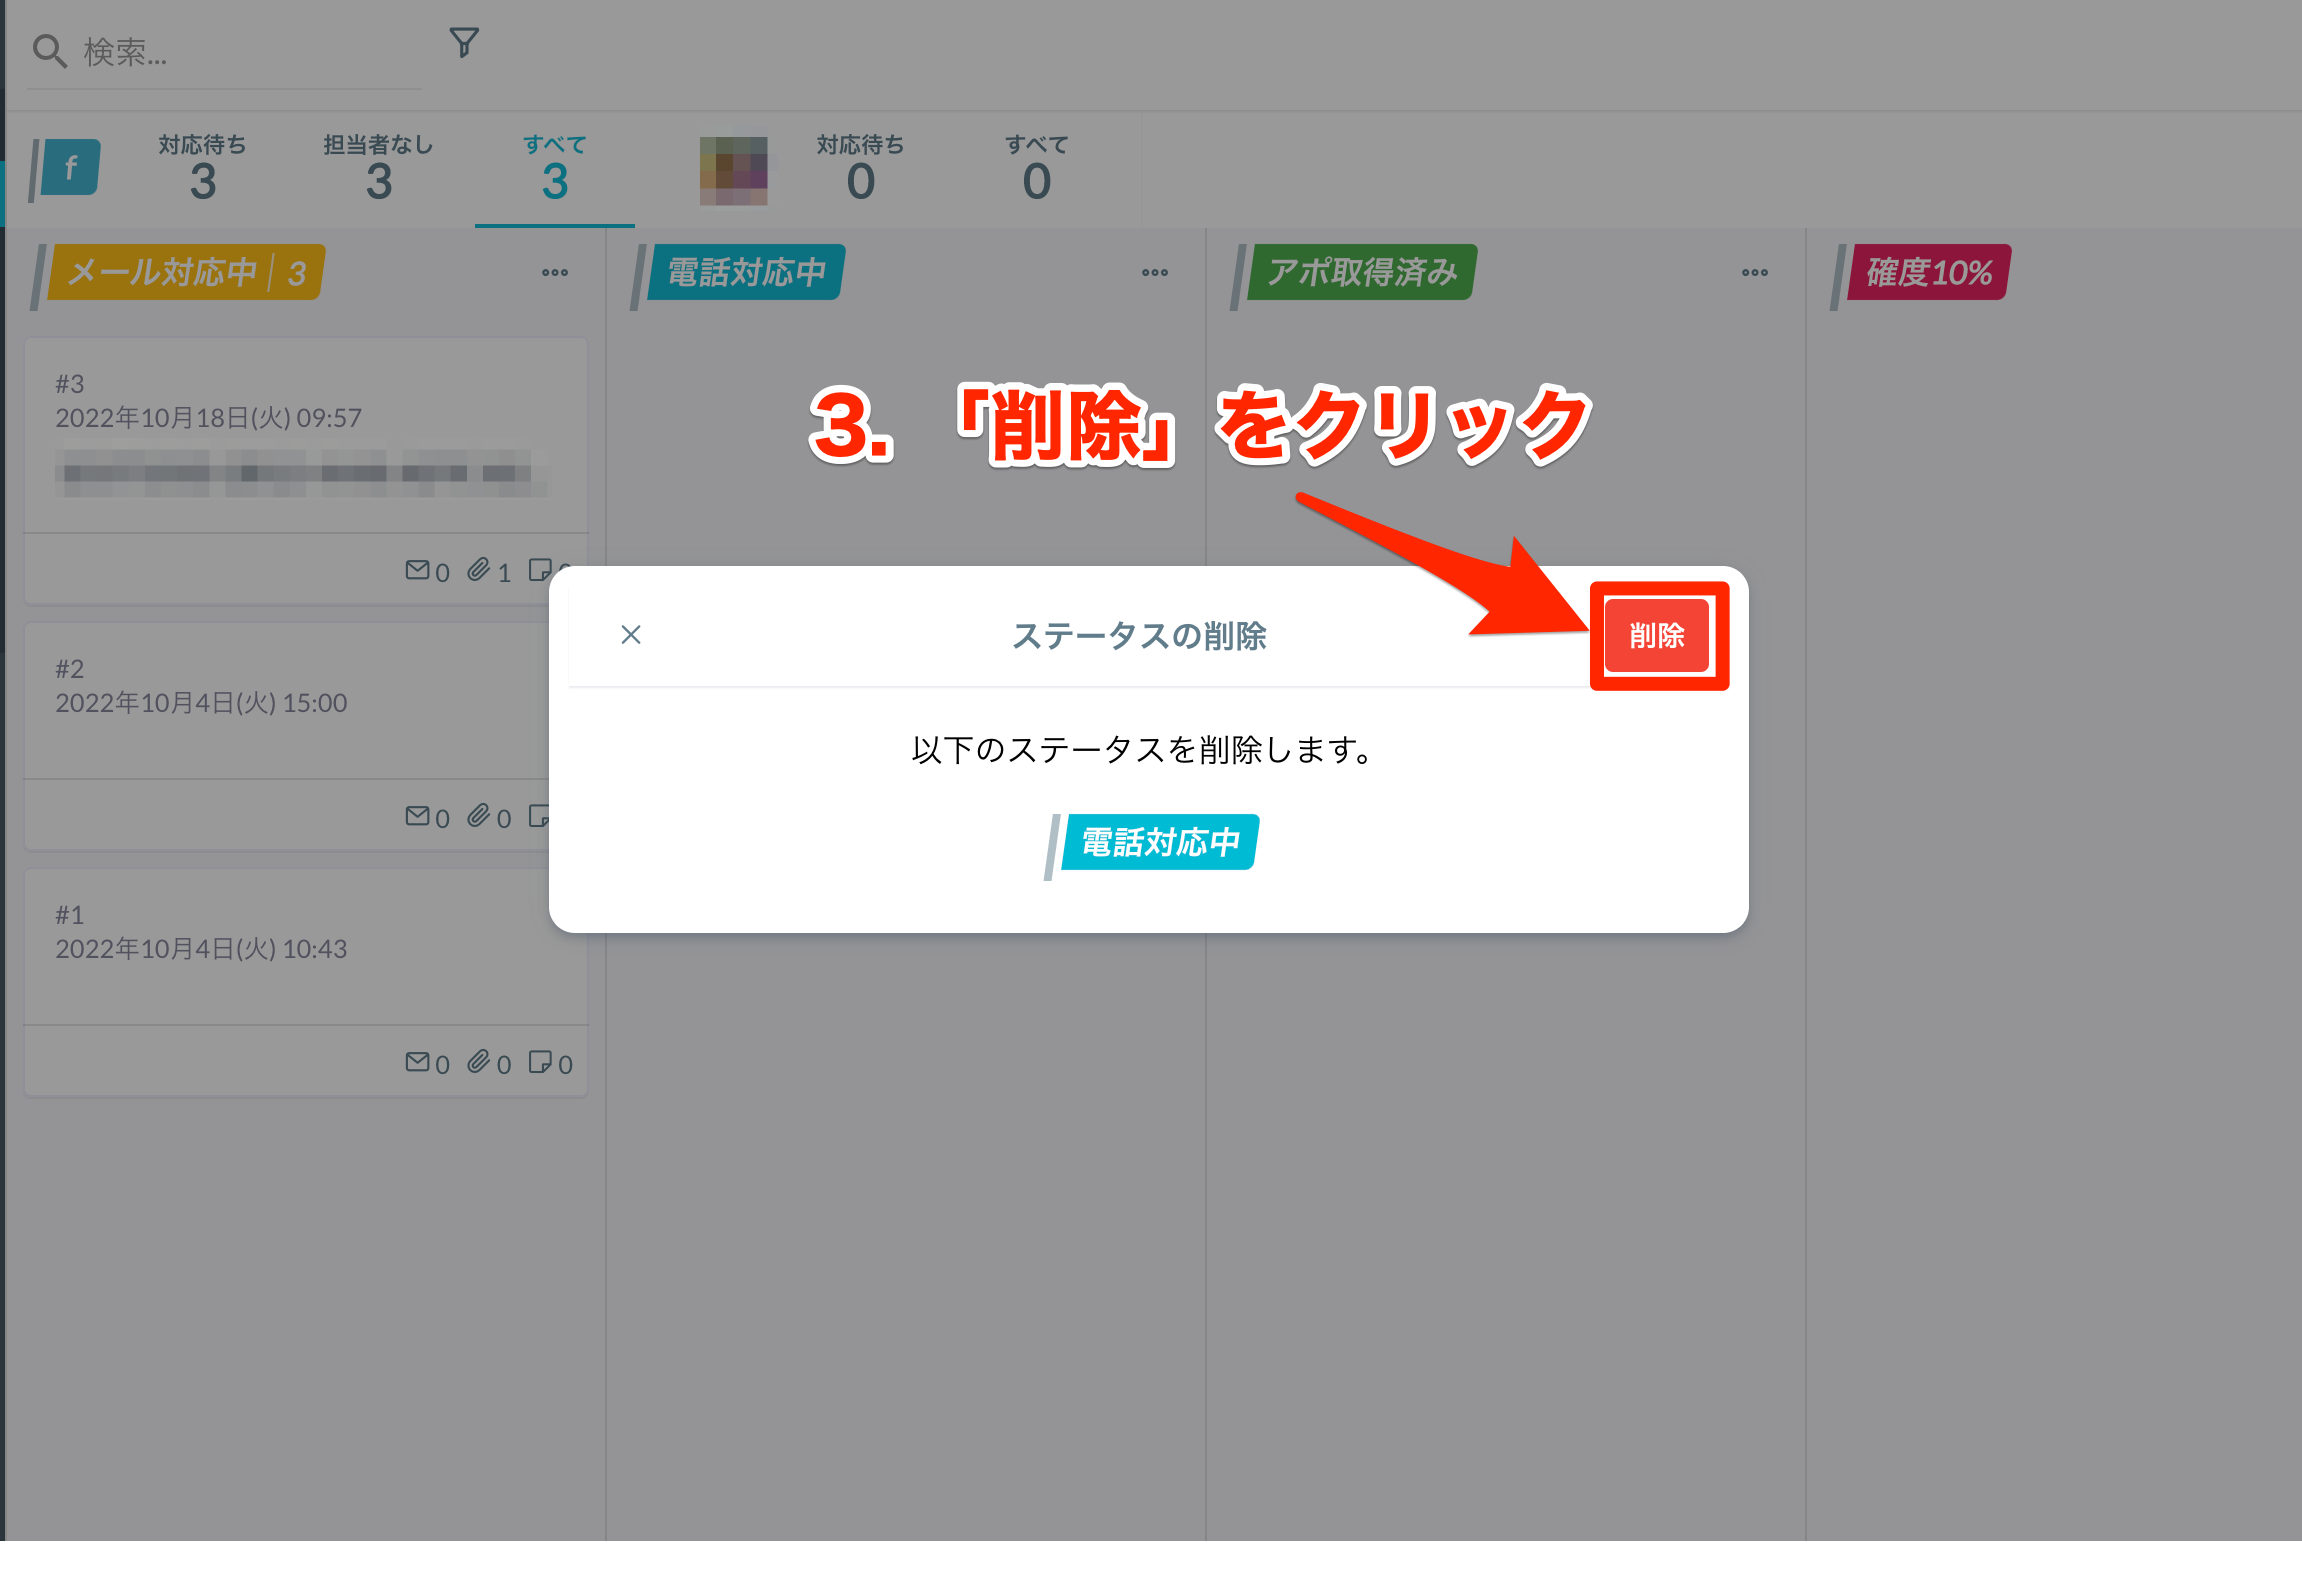
When Deleting a Status with Cards Inside
You can add details to the "Description" of the corresponding status in the "Form > Status Settings" in the settings.

Data input and submission to the form will automatically create cards on the board view.
There are two methods for changing the status:
① Drag and drop the card
② Open the card and click "Status" in the upper right corner
For more information on using cards, please refer to this link. Please enter rich text