-1.png?height=120&name=formrun_logo%20(3)-1.png)
How to link bookrun with formrun.
※bookrun is a scheduling tool provided by our company (Basic Inc.).
For more details about bookrun, please click here.
For information on bookrun integration, please check here.
Please note that this feature requires team-level integration for both formrun and bookrun.
To integrate with bookrun, you need to create a Book Board for use with formrun and bookrun integration. Book Boards used exclusively in bookrun cannot be integrated with formrun, so please be aware of this.
For instructions on how to integrate bookrun with formrun, please see here.
<Table of Contents>
・How to Integrate from the Form Editing Page (Recommended)
When You Have a bookrun Account
When You Don't Have a bookrun Account
・How to Integrate from the Settings Page
When You Have a bookrun Account
When You Don't Have a bookrun Account
When You Have a bookrun Account
<Integration Steps>
- Login to bookrun from the Form Editing Page
- Select the bookrun team to integrate with
- Confirm the integration details
- Integration completed
- Link the "Date Selection" field with the bookrun Book Board
- Linking with the Book Board completed
1. Login to bookrun from the Form Editing Page
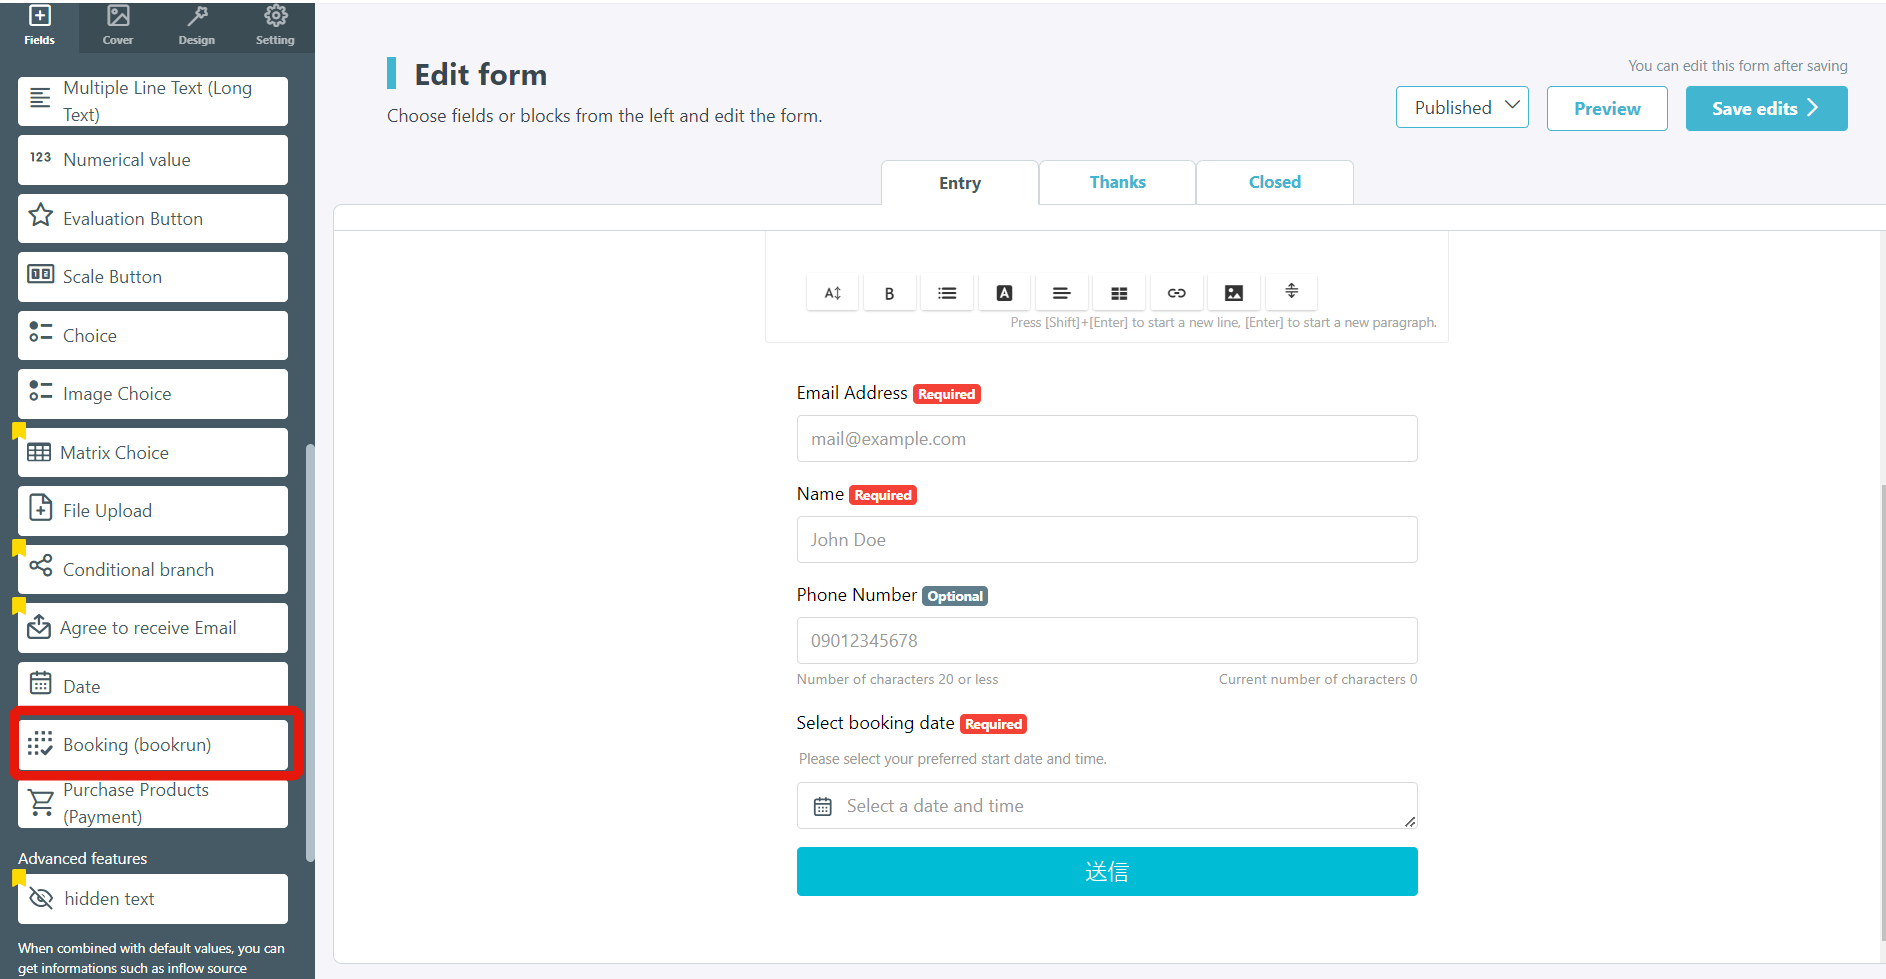
1-1. On the right side of the Form Editing Page, click the "Date Selection" field
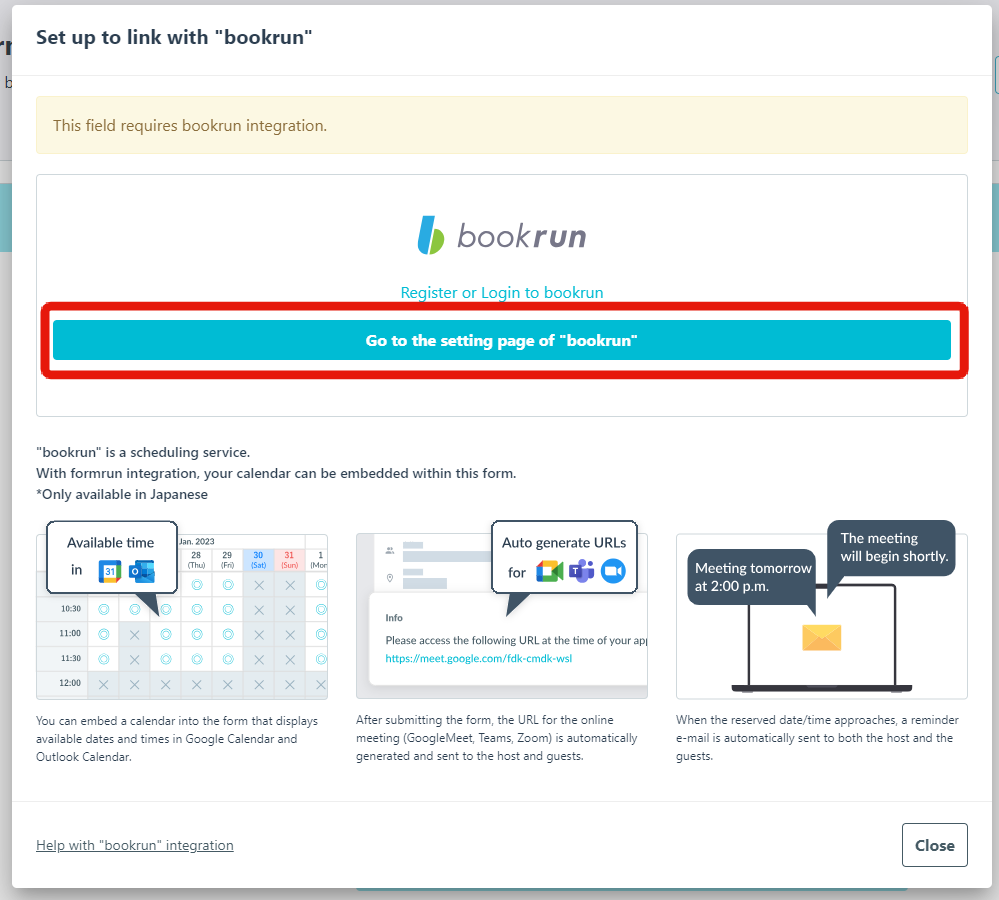
1-2. Click "Move to bookrun" in the displayed bookrun integration modal
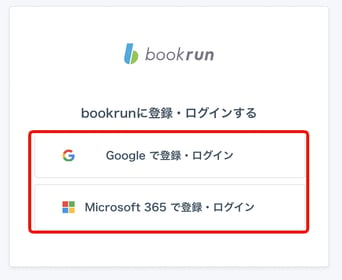
1-3. Click "Google" or "Microsoft365"
Select the service where your bookrun account is registered and log in.
- In case of Google integration
After selecting the account you want to integrate, choose "Allow"
- In case of Microsoft365 integration
After entering the email address and password of the account you want to integrate, choose "Sign In"
2. Select the bookrun Team to Integrate With
Click "Select" next to the bookrun team you want to link with the form you're creating.
* Note that you need to create the team in bookrun in advance if you want to specify a team.

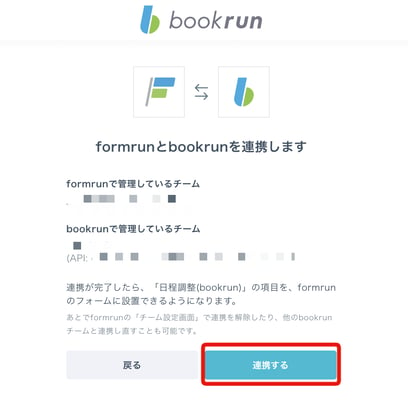
3. Confirm Integration Details
Check if there are any discrepancies between the teams for formrun and bookrun where you want to establish integration, and click "Integrate".
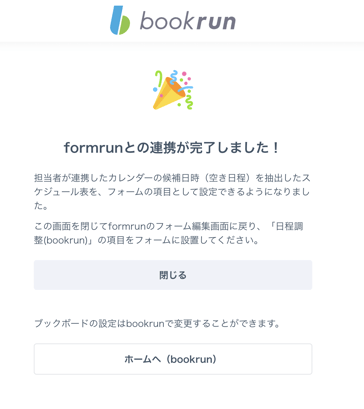
4. Integration Completed
Integration with bookrun is complete.
This FAQ will continue to explain how to add the "Date Selection" field to your formrun form, so please click "Close".
- "Close" → Transition to the formrun form editing page
- "Go to Home (bookrun)" → Transition to the bookrun home page
5. Link the "Date Selection" Field with the bookrun Book Board
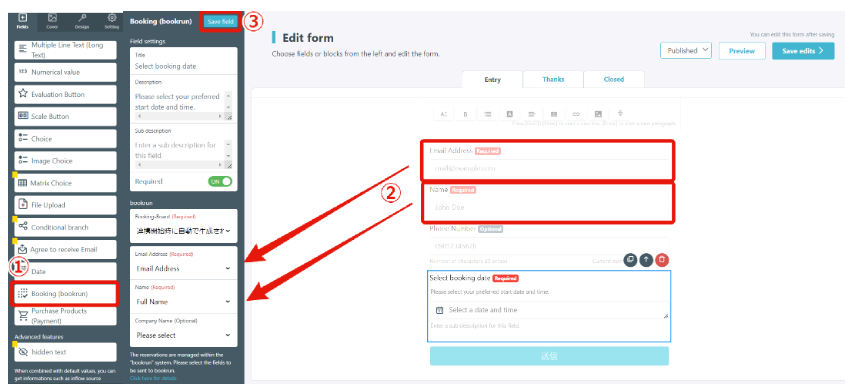
5-1. Click the "Date Selection" field again on the form editing page
5-2. Confirm that the "Date Selection" field has been added to the form editing page
5-3. Select "Name," "Email Address," and "Company Name" under "bookrun Integration" in the "Field Settings" from among the form fields.
5-4. Click "Save Field Settings" in "Field Settings"
* Please note that the reservation information received through the form will be managed in bookrun.
Check in the bookrun Book Board page.
6. Linking with the Book Board Completed
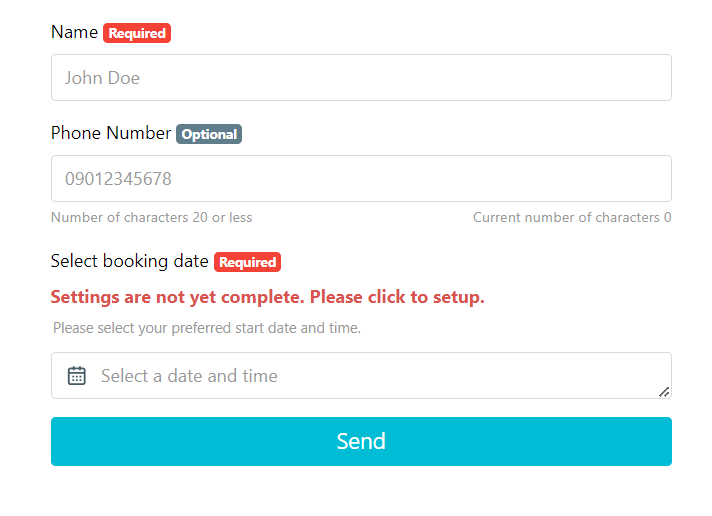
Linking is complete when you have selected each field under "bookrun Integration" in the "Field Settings" for "bookrun Integration" and resolved the error display for the "Date Selection" field on the form editing page.
* Incomplete integration will result in errors like the one shown below.
When You Don't Have a bookrun Account
<Integration Steps>
- Create a bookrun Account from the Form Editing Page
- Confirm the integration details
- Integration completed
- Link the "Date Selection" field with the bookrun Book Board
- Linking with the Book Board completed
1. Creating a bookrun Account from the Form Editing Page
1-1. On the left side of the Form Editing Page, click the "Date Selection" field
1-2. Click "Move to bookrun" in the displayed bookrun integration modal
1-3. Click "Google" or "Microsoft365"
Select the respective service to create a bookrun account.
- In case of Google integration
After selecting the account you want to integrate, choose "Continue"
* For the "Access to Account" page, please check all fields.
- In case of Microsoft365 integration
After entering the email address and password of the account you want to integrate, choose "Sign In"
2. Confirming Integration Details
Check if there are any discrepancies between the teams for formrun and bookrun where you want to establish integration, and click "Integrate".
3. Integration Completed
Integration with bookrun is complete.
This FAQ will continue to explain how to add the "Date Selection" field to your formrun form, so please click "Close".
- "Close" → Transition to the formrun editing page
- "Go to Home (bookrun)" → Transition to the bookrun home page
4. Linking the "Date Selection" Field with bookrun's Book Board
4-1. Click the "Date Selection" field again on the form editing page
4-2. Confirm that the "Date Selection" field has been added to the form editing page
4-3. From within the form fields, select "Name," "Email Address," and "Company Name" under "bookrun Integration" in "Field Settings."
4-4. Click "Save Field Settings" in "Field Settings"
* Please note that the reservation information received through the form will be managed in bookrun.
Check in the bookrun Book Board page.
5. Linking with the Book Board Completed
Linking is complete when you have selected each field under "bookrun Integration" in the "Field Settings" for "bookrun Integration" and resolved the error display for the "Date Selection" field on the form editing page.
* Incomplete integration will result in errors like the one shown below.
How to Integrate and Link bookrun from the Form Settings Page
When You Have a bookrun Account
<Integration Steps>
- Generate a bookrun API Key
- Paste the API Key to establish integration
- Integration completed
- Link the "Date Selection" field with bookrun's Book Board
- Linking with the Book Board completed
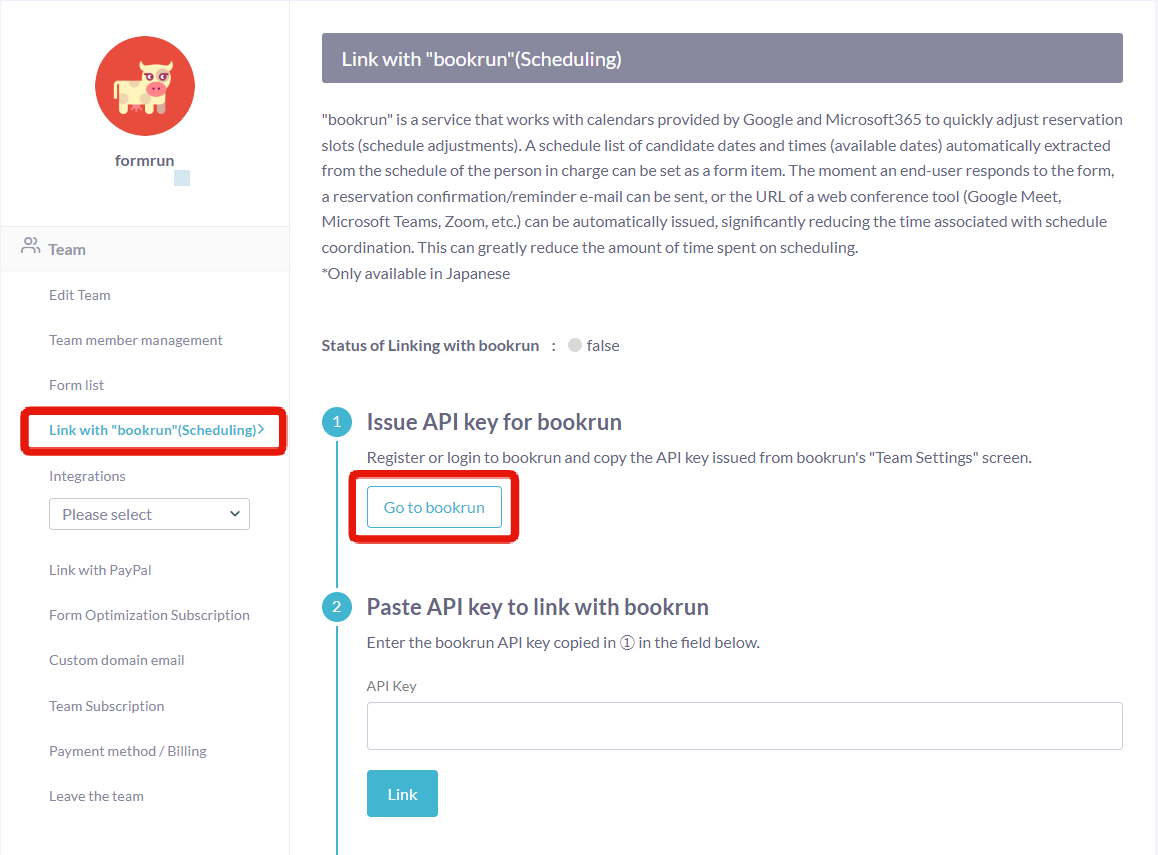
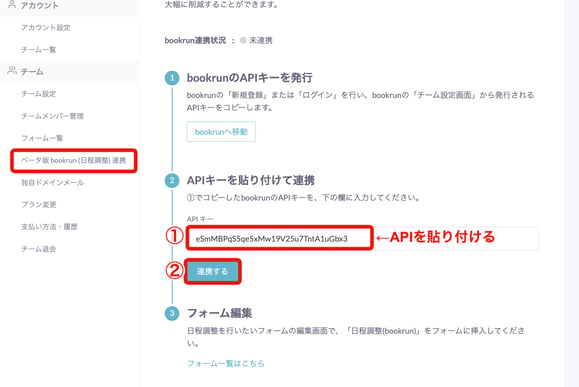
1. Generating a bookrun API Key
1-1. Click "bookrun (Scheduling) Integration" in the settings
1-2. Click "Move to bookrun" from "Generate a bookrun
4-4. Click "Save Field Settings" in "Field Settings"
※ Reservation information received through the form will be managed in bookrun.
Please check in the bookrun Book Board page.
5. Linking with the Book Board Completed
Linking is complete when you have selected each field under "bookrun Integration" in the "Field Settings" for "bookrun Integration" and resolved the error display for the "Date Selection" field on the form editing page.
* Incomplete integration will result in errors like the one shown below.
If You Don't Have a bookrun Account
<Integration Steps>
- Create a bookrun Account
- Basic Information and Team Setup
- Confirm Tutorial and Create a Book Board
- Generate a bookrun API Key
- Paste the API Key to Establish Integration
- Integration Completed
- Link the "Date Selection" Field with bookrun's Book Board
- Linking with the Book Board Completed
1.Creating a bookrun Account
1-1. Click "bookrun (Scheduling) Integration" in the settings
1-2. Click "Move to bookrun" from "Generate a bookrun API Key"
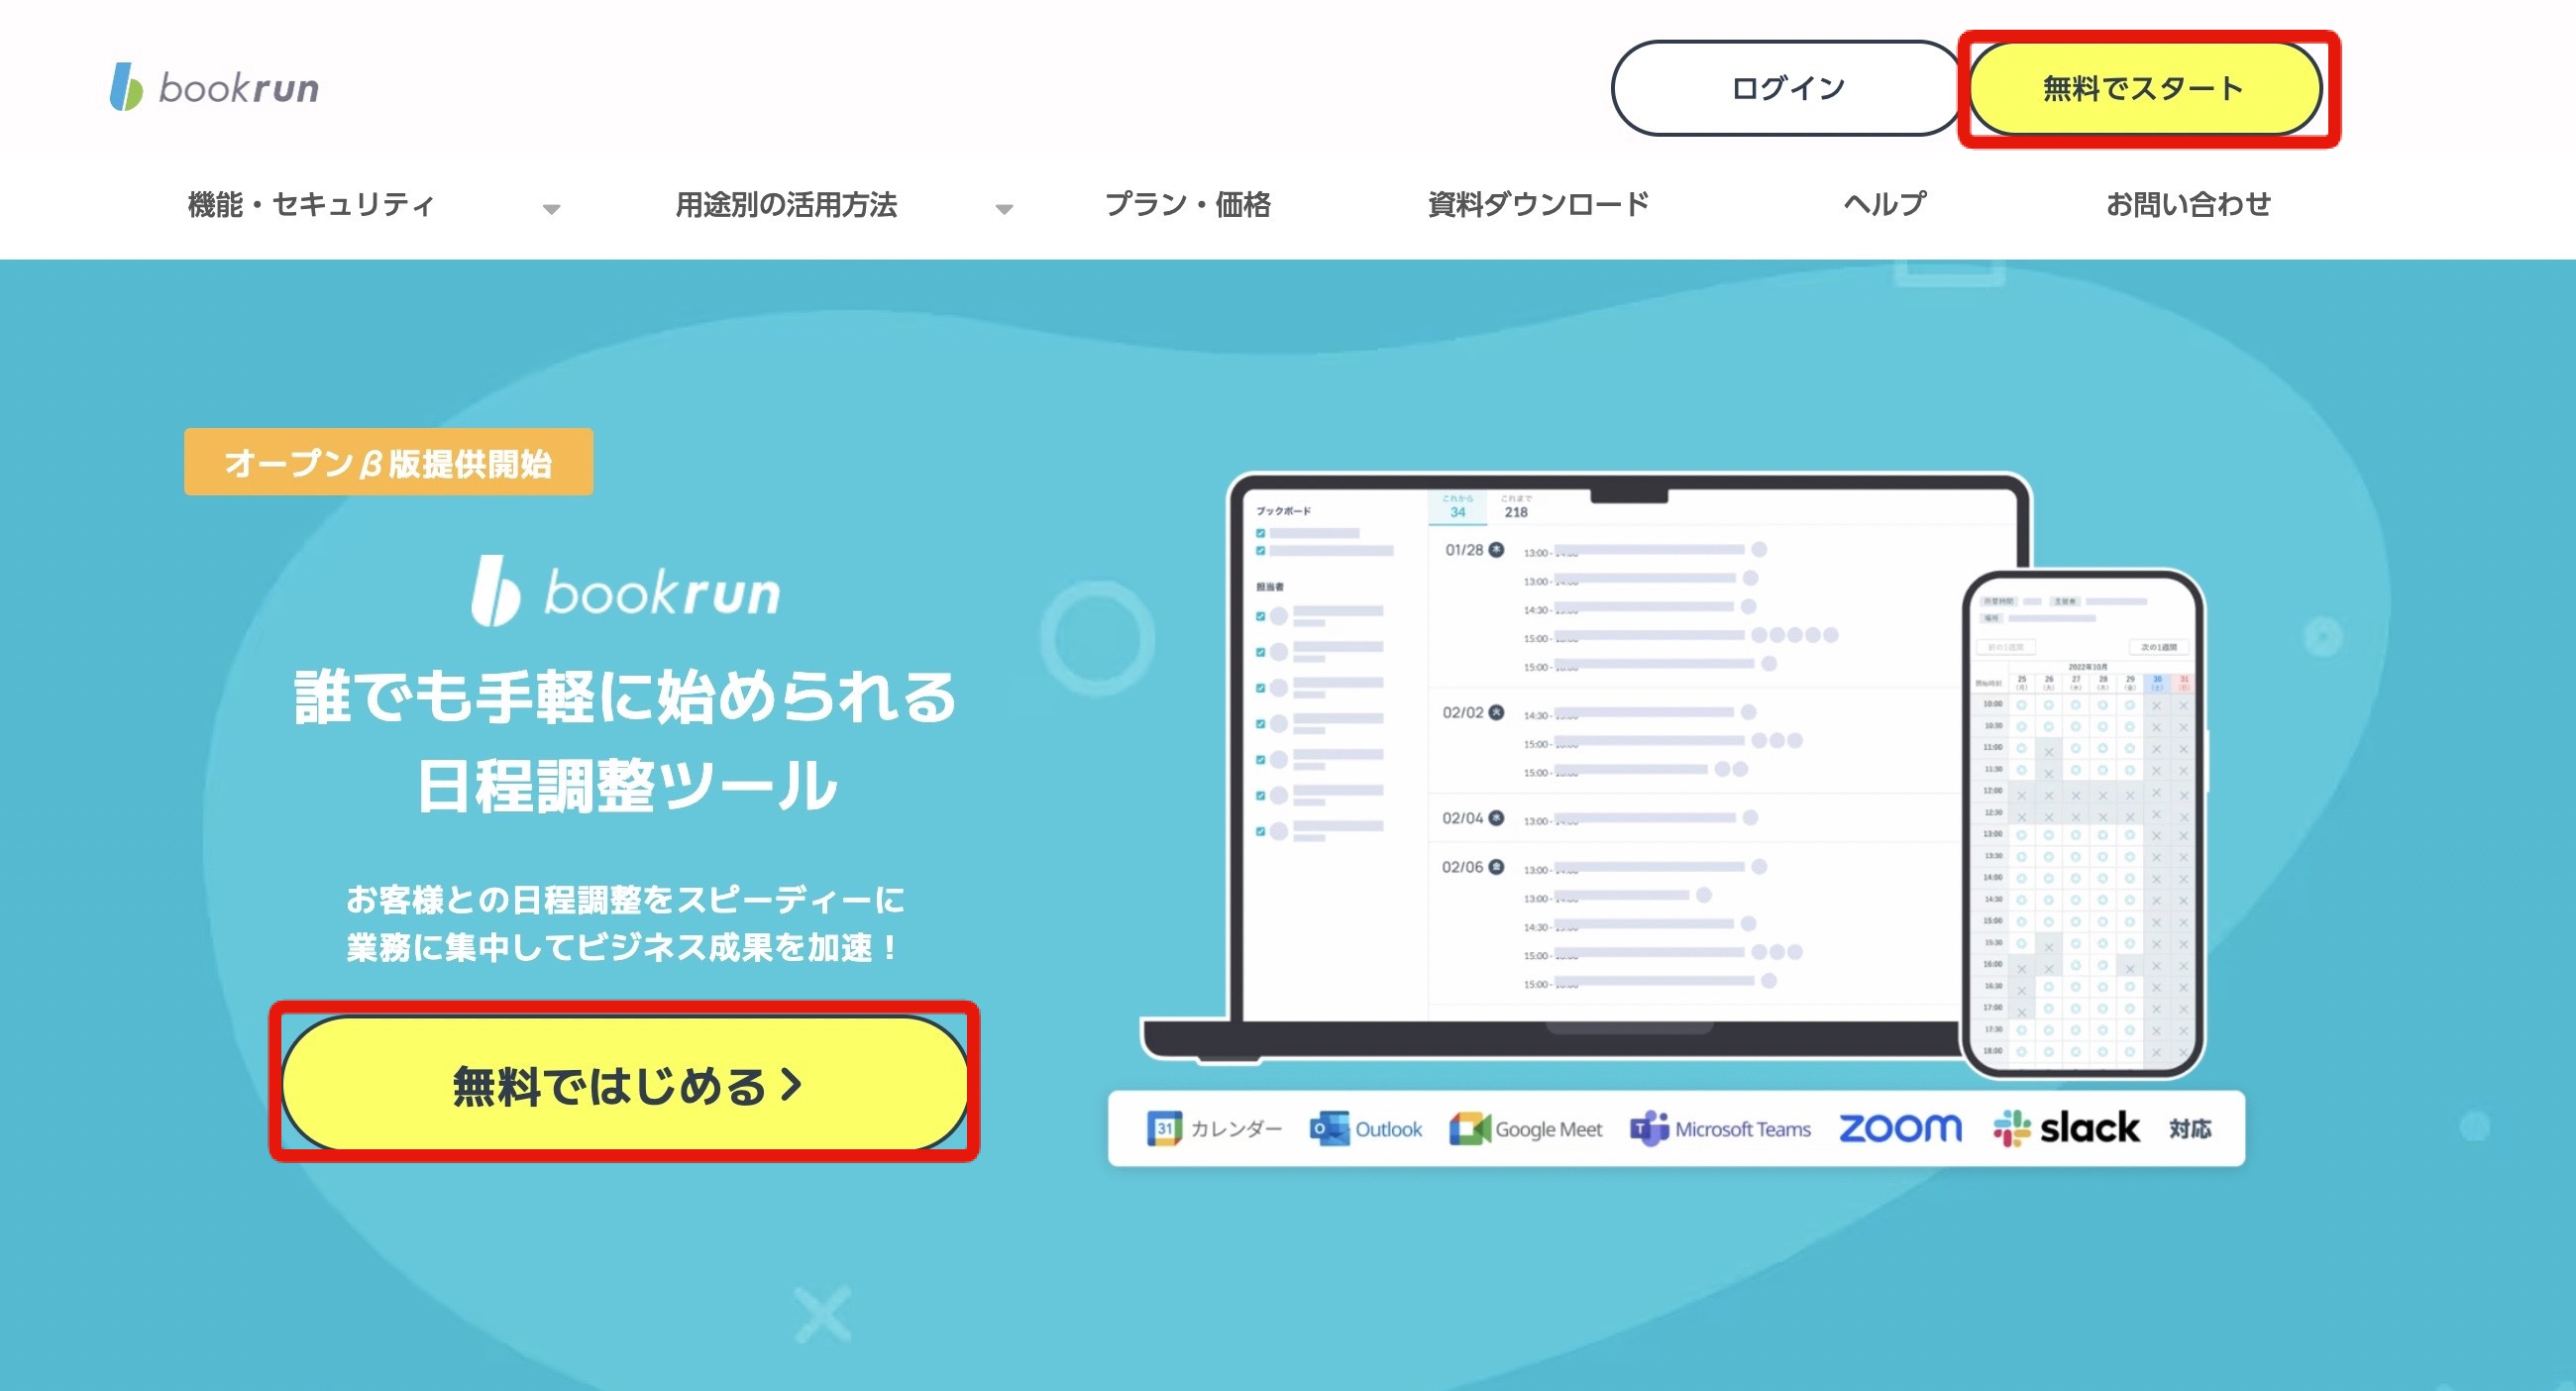
1-3. After transitioning to the service site, click "Start for Free" or "Get Started for Free"
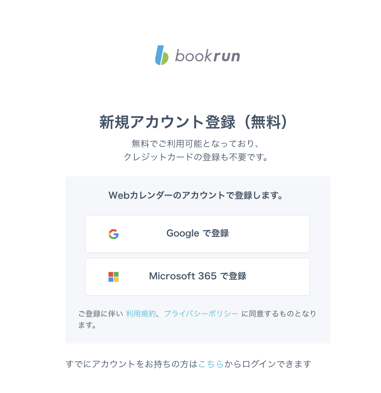
1-4. Click the service to create a bookrun account from "Google" or "Microsoft365"
Create a bookrun account with your preferred service.
- In case of Google integration
After selecting the account you want to integrate, choose "Continue"
* For the "Access to Account" page, please check all fields.
- In case of Microsoft365 integration
After entering the email address and password of the account you want to integrate, choose "Sign In"
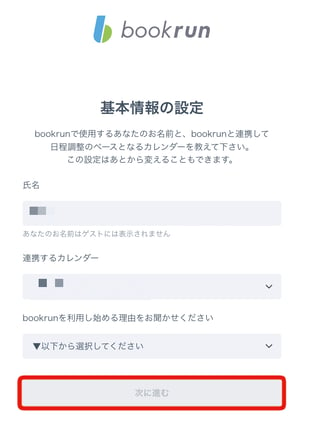
2. Basic Information and Team Setup
2-1. Fill in the fields displayed on the "Basic Information Setup" page
2-2. Click "Next"
* Please note that you cannot proceed to the next step if not all fields are filled in.
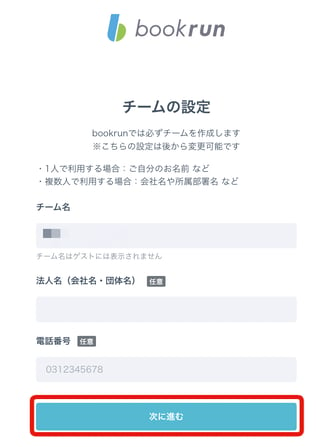
2-3. Fill in the fields displayed on the "Team Setup" page
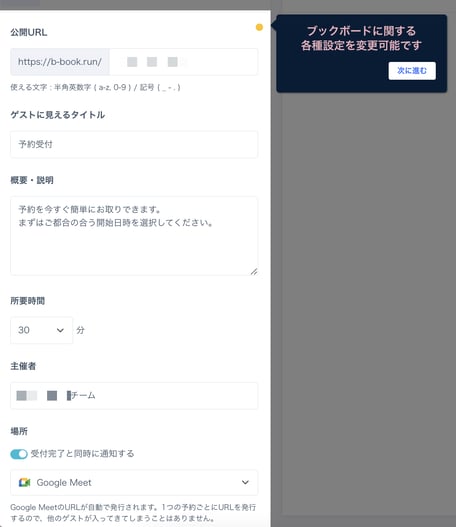
3. Confirm Tutorial and Create a Book Board
Once team setup is complete, you will be taken to the Book Board page.
For the first time, there is a tutorial on the Book Board page, so please check its contents.
3-1. After confirming the tutorial content, click "Next"
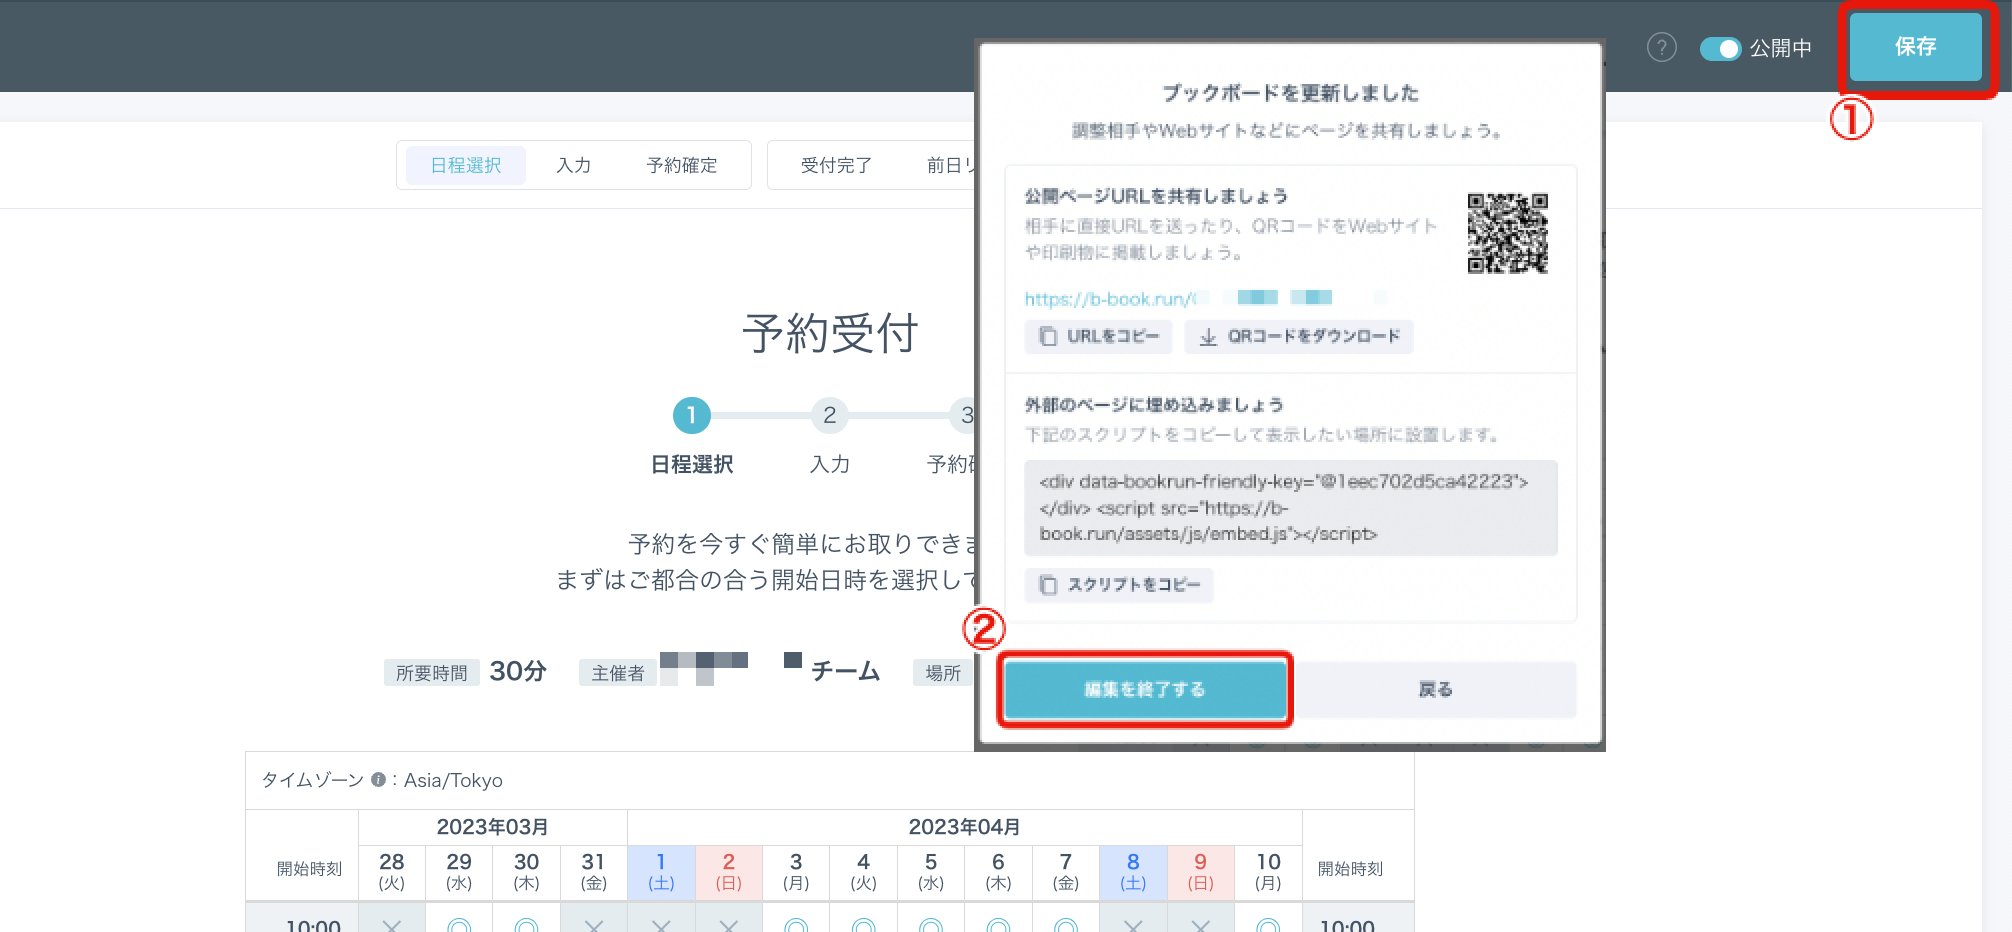
3-2. Click the "Save" button in the upper right corner of the page
3-3. Click "Finish Editing" in the displayed modal
Once the modal "Updated the Book Board" is displayed, the creation of the Book Board is complete.
Next, please generate a bookrun API Key to continue the integration between formrun and bookrun.
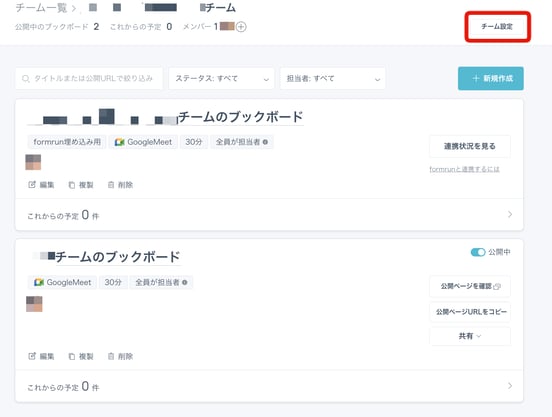
4. Generating the bookrun API Key
4-1. Click the "Team Settings" button in the upper right corner of the Book Board list page
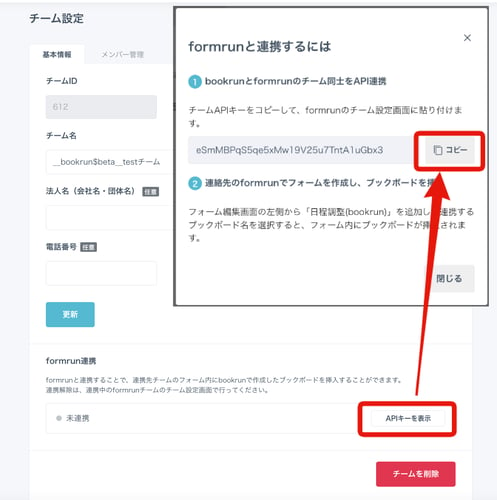
4-2. Click "Display API" under "formrun Integration"
4-3. Copy the displayed API key
5. Pasting and Linking the API Key
5-1. In the formrun settings page for "bookrun (Scheduling) Integration," in the "Paste and Link API Key" section,
paste the API key copied from bookrun
5-2. Click "Link"
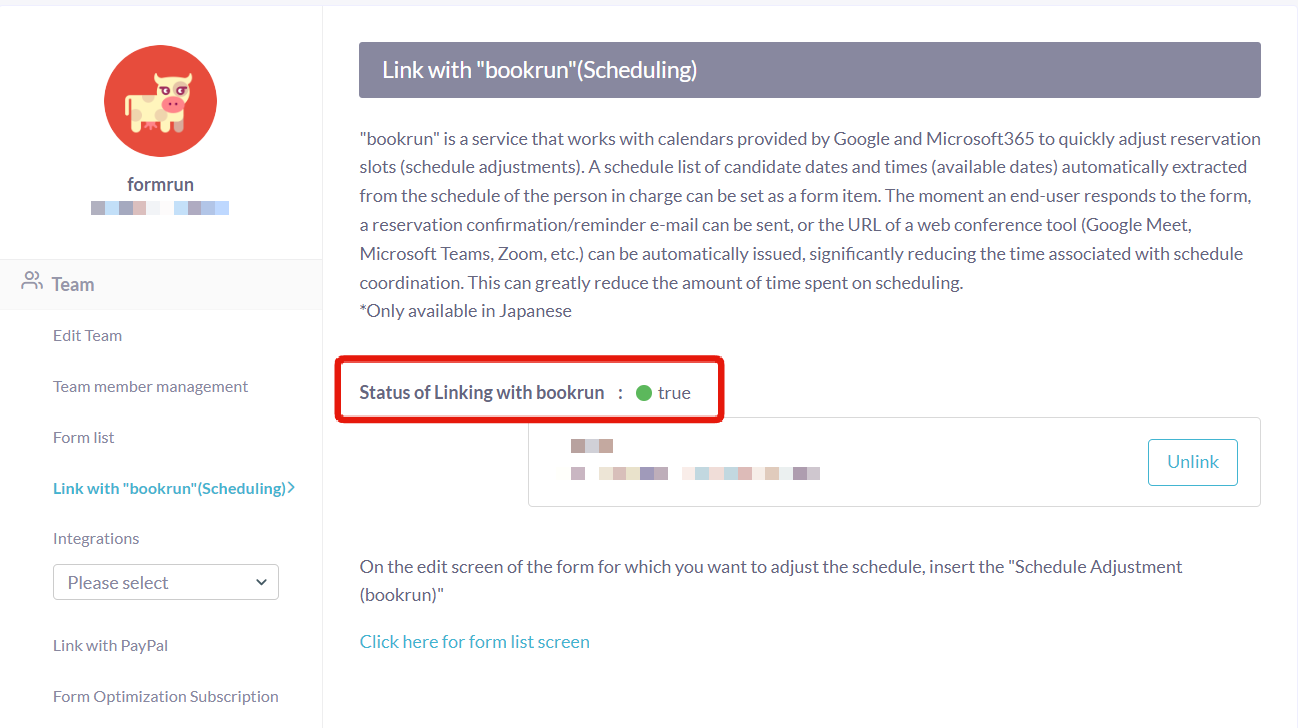
6. Integration Completed
Confirm the display "bookrun Integration Successful" in the upper left corner of the page,
and when "Integration Status with bookrun" is a green circle labeled "Linked," integration is complete.
In this FAQ, we will continue to explain how to set up the "Date Selection" field on the formrun form.
7. Linking the "Date Selection" Field with bookrun's Book Board
7-1. In the form editing page, click the "Date Selection" field again
7-2. Confirm that the "Date Selection" field has been added to the form editing page
7-3. From the "Field Settings" in the left pane under "bookrun Integration," select "Name," "Email Address," and "Company Name" from the formrun form fields
7-4. Click "Save Field Settings"
* Reservation information received through the form will be managed in bookrun.
Please check in the bookrun Book Board page.
8. Linking with the Book Board Completed
Linking is complete when you have selected each field under "bookrun Integration" in the "Field Settings" for "bookrun Integration" and resolved the error display for the "Date Selection" field on the form editing page.
* Incomplete integration will result in errors like the one shown below.