-1.png?height=120&name=formrun_logo%20(3)-1.png)
How to create individual emails and when there is a time lag or sending failure.
How to Create and Send Individual Emails
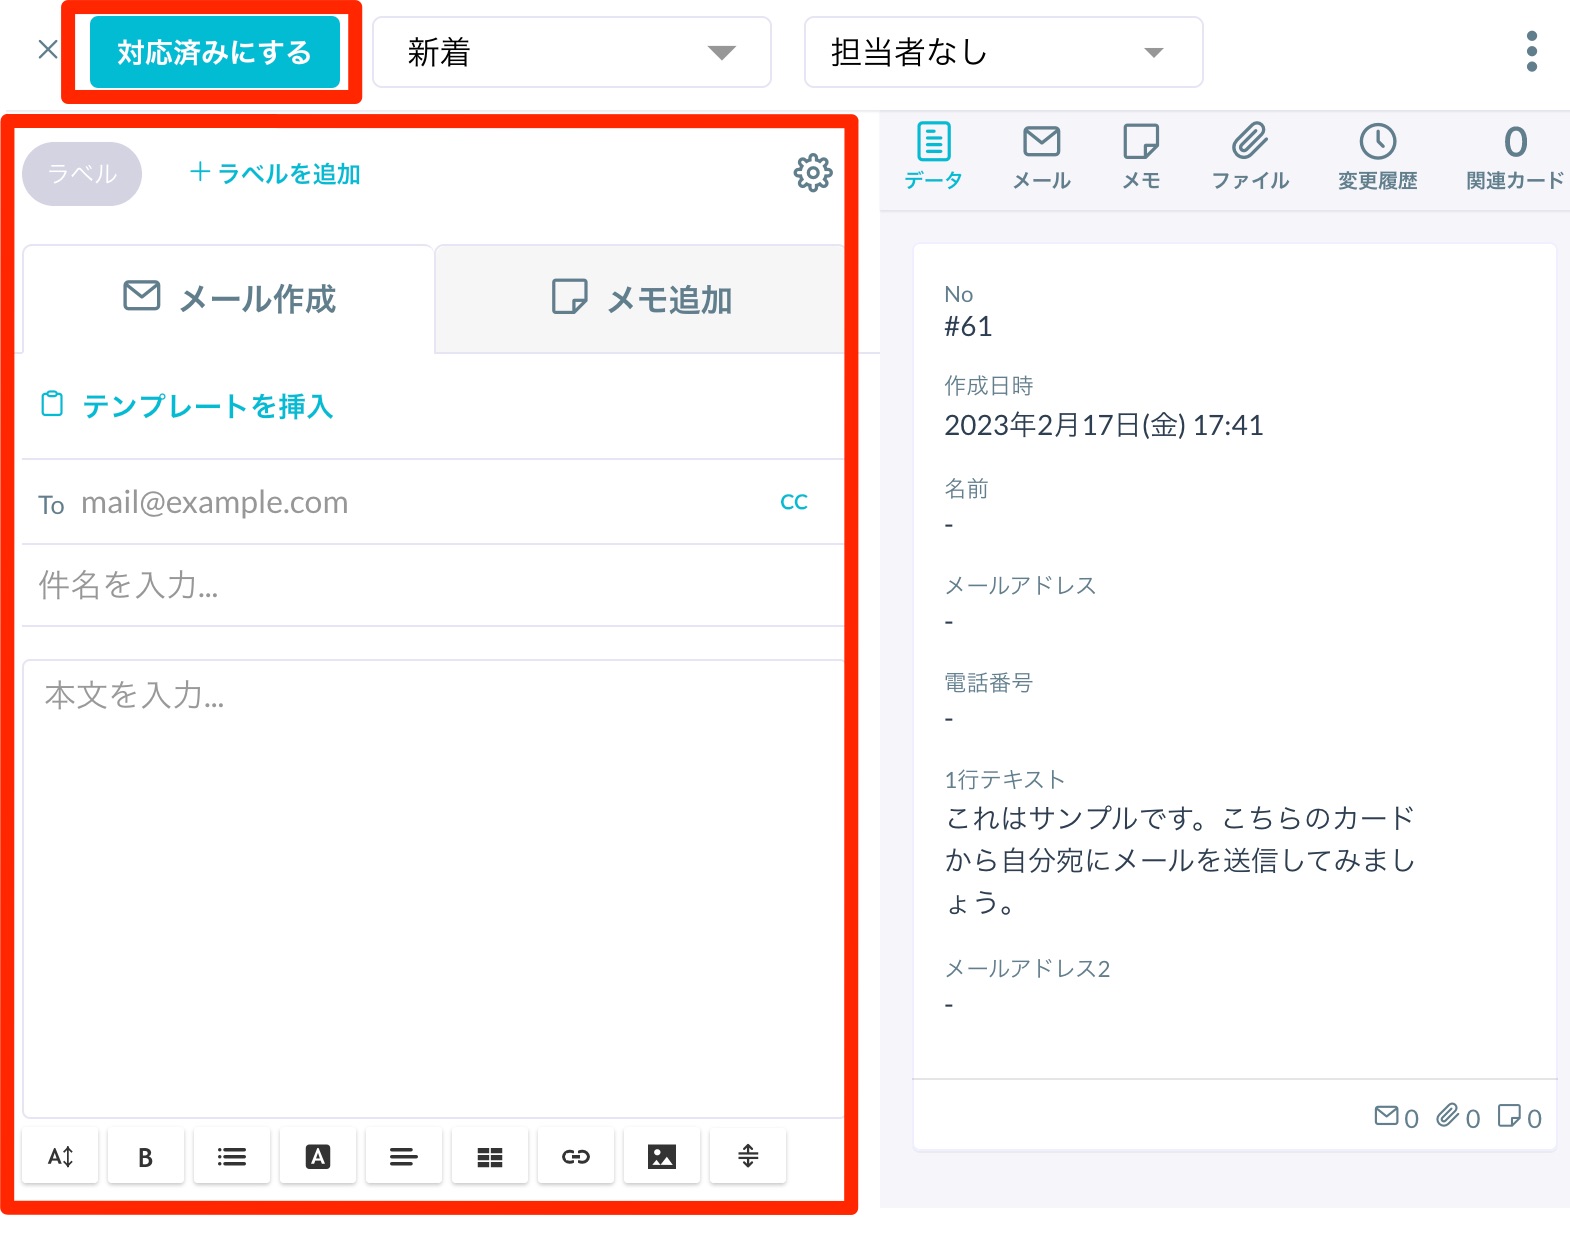
When you open a card, you will find the mail send/receive section on the left side.
- Recipient's email address (cc is possible, Bcc is not)
- Subject
- Body (in HTML format)
Fill in the required information and send the email.
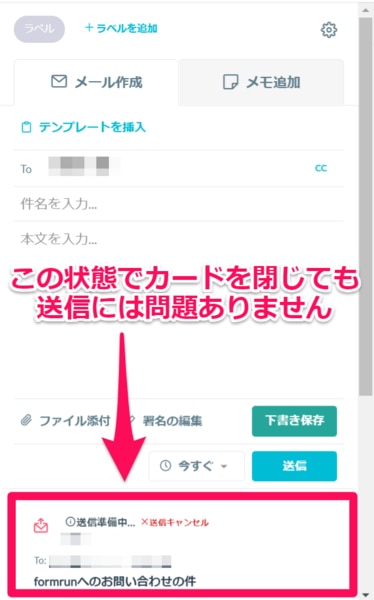
After clicking the "Send" button, there will be a 30-second delay before the email is actually sent to allow for cancellation. During this time, the message "Preparing to Send" will be displayed. However, you can close the card without any issues, and the email will be sent.
If there is an error in the email address of the form respondent, it may result in sending failure.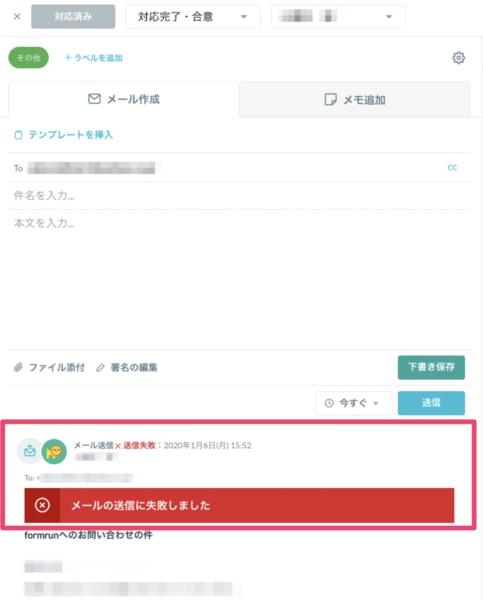
If you want to receive notifications in case of sending failure, please integrate with one of the following:
(1) Email notification
(2) Chat tool notification
If you wish to configure chat tool notifications, please use the BEGINNER plan or higher.
How to Reply to Individual Emails
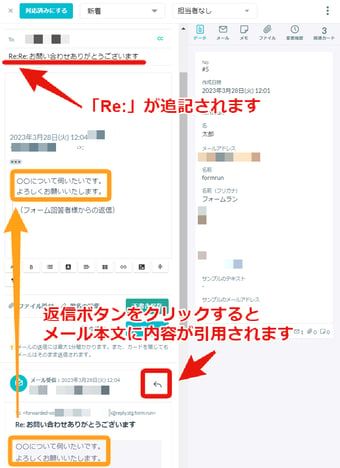
By pressing the "Reply" button for emails received from form respondents, the following will be automatically added:
- Subject: "Re:" will be appended
- Email Body: The content of the email from the form respondent will be quoted
About Editing the Body of Individual Emails
In individual emails, you can change text color, size, add tables, and links.
The following settings are available:

- Font size (from 10px to 30px)
- Bold
- Lists (numbered lists, bulleted lists)
- Font color (change text and highlight color using the color picker)
- Text alignment (left, center, right, justify)
- Insert table (add or delete columns and rows)
- Insert link
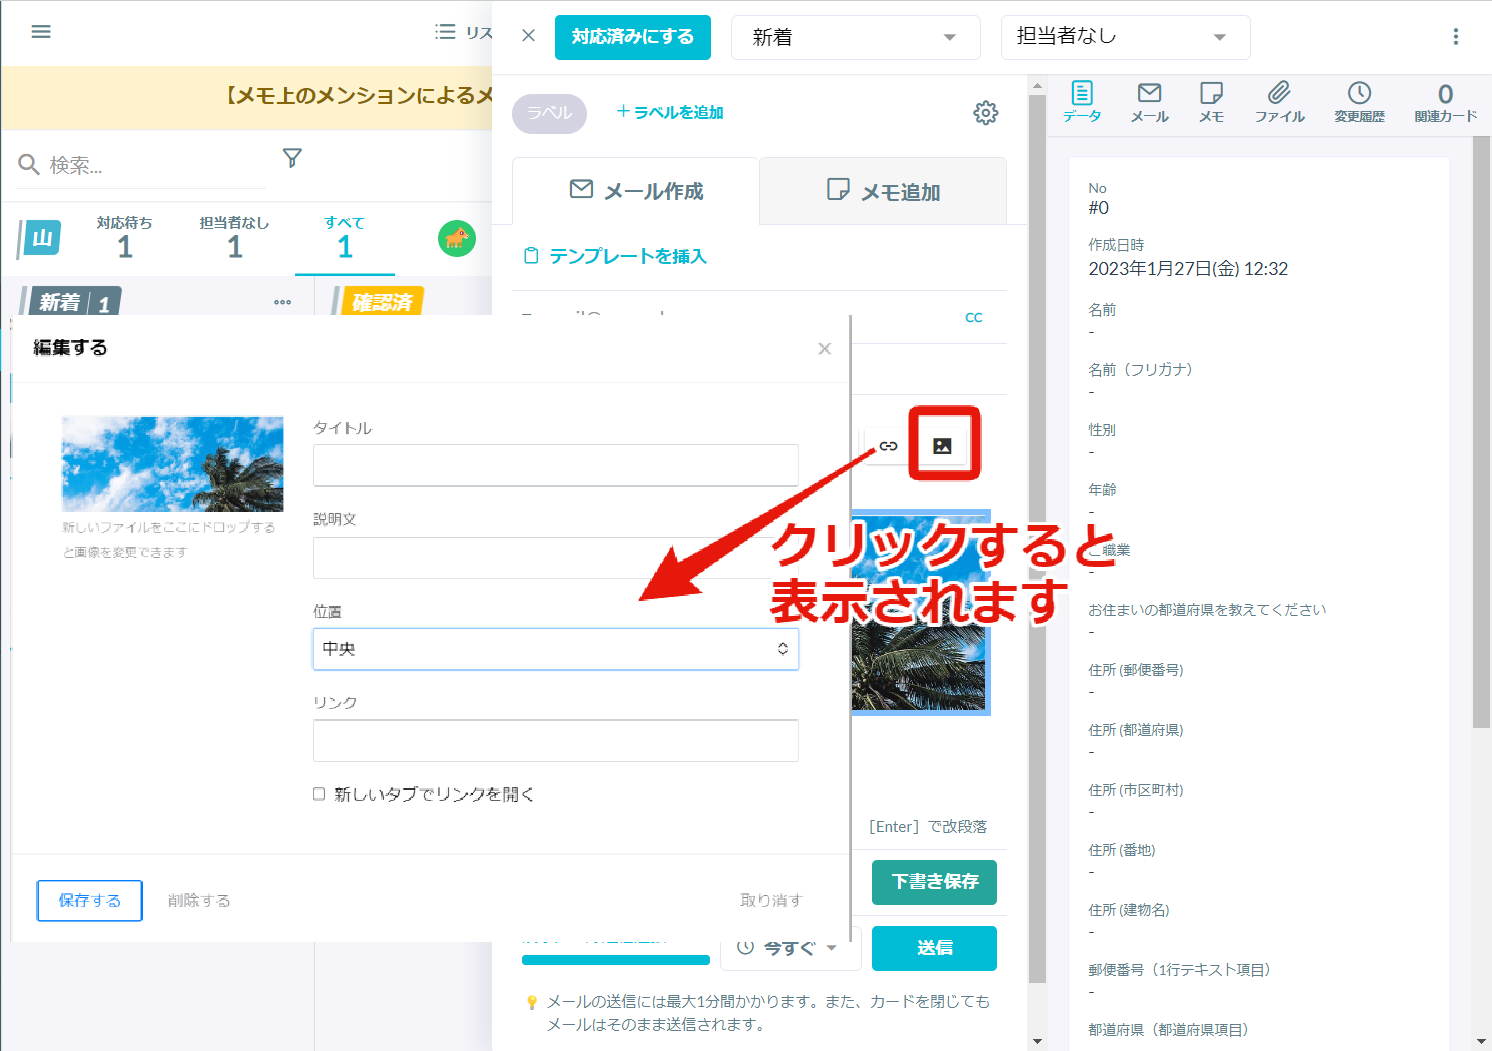
- Insert image (configure image title, description, position, and add links)
- Separator (insert a horizontal line)
Image alignment can be set to "Left," "Center," or "Right."
※Settings are available in either of the following locations:
- Click on the image icon (see pageshot below)
- Click on the image and select "Edit"
※Starting from January 24, 2023, individual emails have been changed to "HTML format." You cannot turn off rich text functionality or switch to "text format" emails.