-1.png?height=120&name=formrun_logo%20(3)-1.png)
How to set up LINE WORKS to be notified when a form is submitted.
- What is LINE WORKS Notification
- Setting up formrun
- Before obtaining the necessary information for integration
What is LINE WORKS Notification
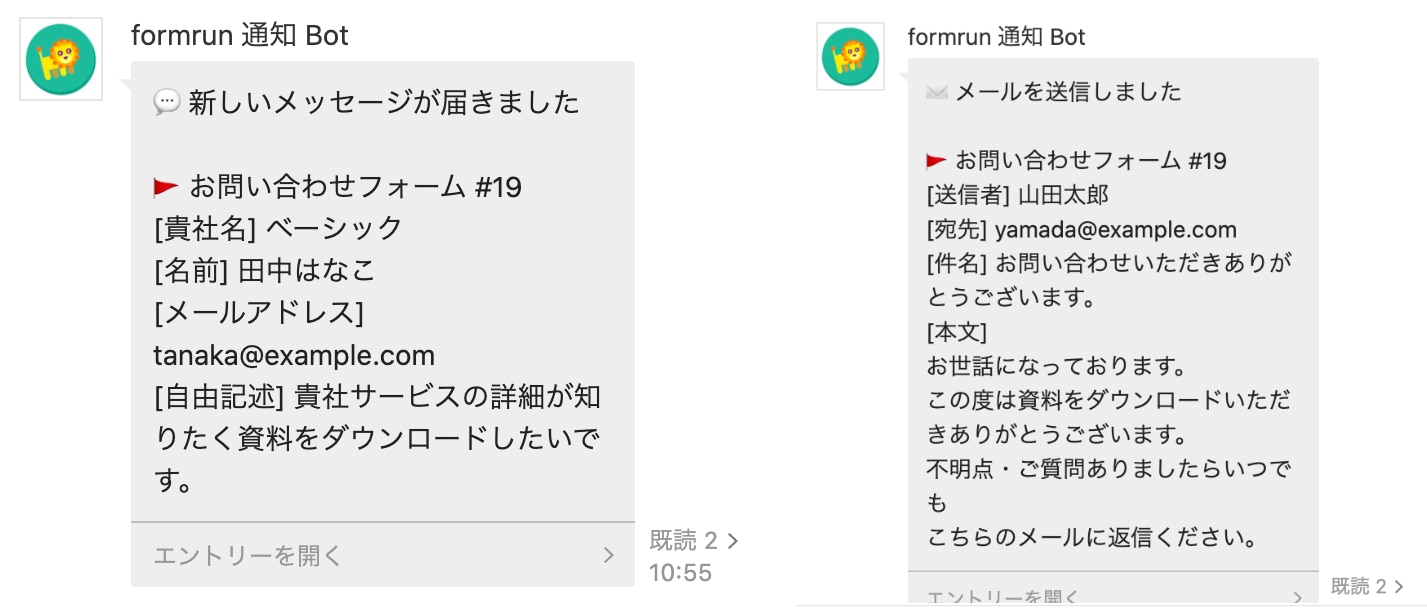
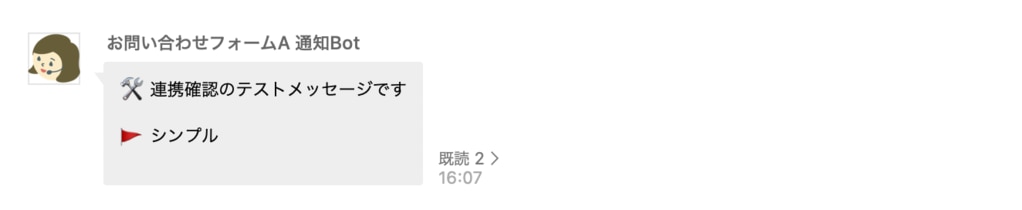
By integrating formrun with LINE WORKS, you can receive notifications from formrun via the LINE WORKS Bot.
Setting up formrun
The method for setting up form submission notifications in LINE WORKS is as follows:
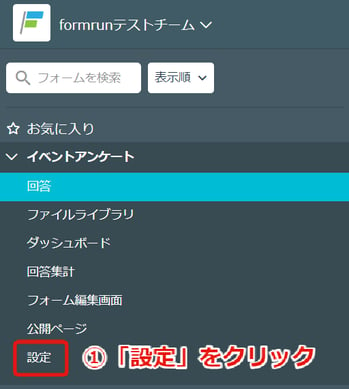
1. Open 'Settings' from the board page or the list page on the left
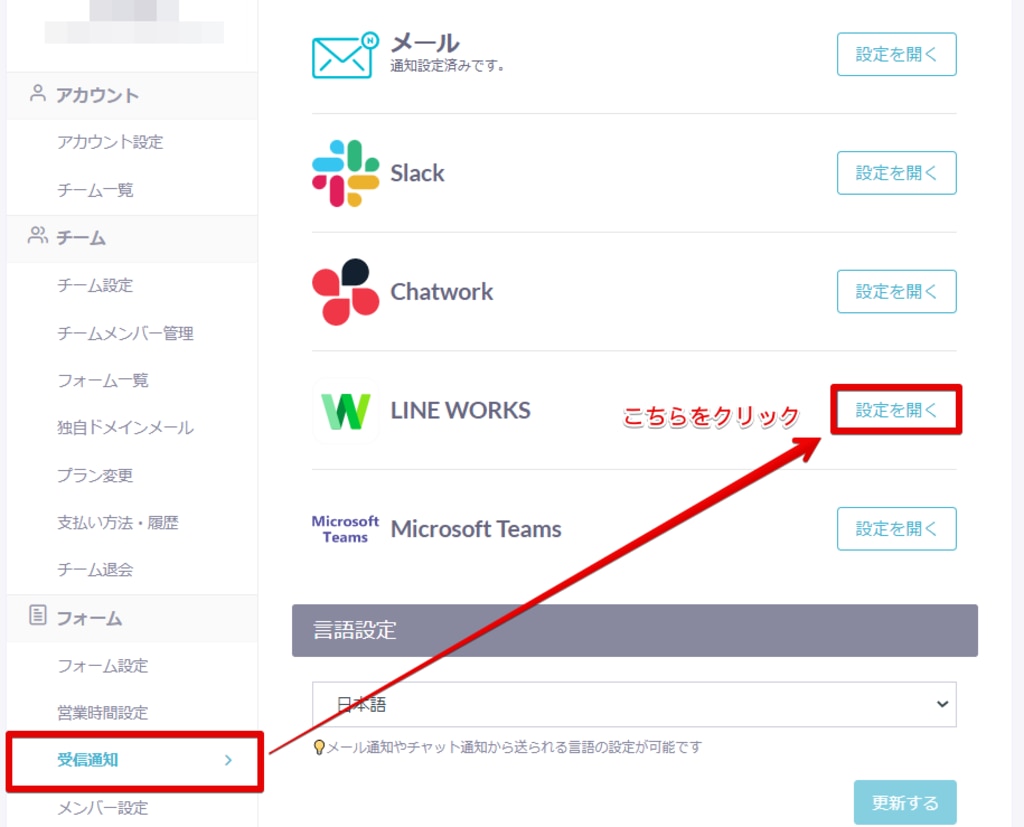
2. Click 'Open Settings' from the settings page 'Form>Submissions>LINE WORKS'
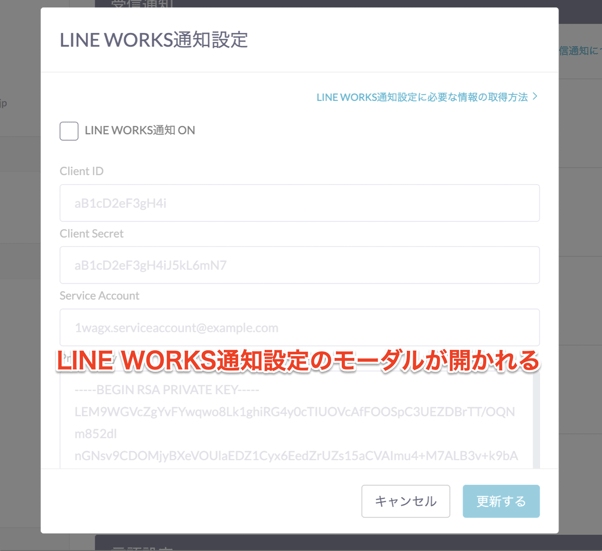
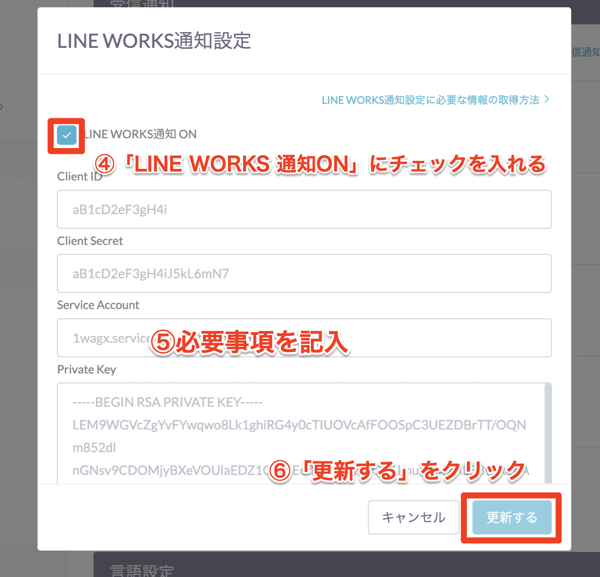
4. Check the 'LINE WORKS Notification ON' box
5. Enter the information* necessary for notification integration
*Please refer to the section below 'Obtaining the information necessary for API authentication' for how to obtain this information
6. Click 'Update'
If you want to receive submission notifications from multiple forms, you need to integrate each form separately.
Currently, LINE WORKS notifications do not support selecting types of notifications (so that only form submissions are notified, etc.) or limiting the fields to be notified (e.g., notifying only the name and company name).
How to switch from API Version 1.0 to API Version 2.0
Users who have been using LINE WORKS API Version 1.0 need to switch to API Version 2.0 by April 30th, 2023 (Sunday).
The method to switch is as follows:
1) Click on "Open Settings" from the settings page "Form>Reception Notification>LINE WORKS".
2) Choose "2.0" in "API Version".
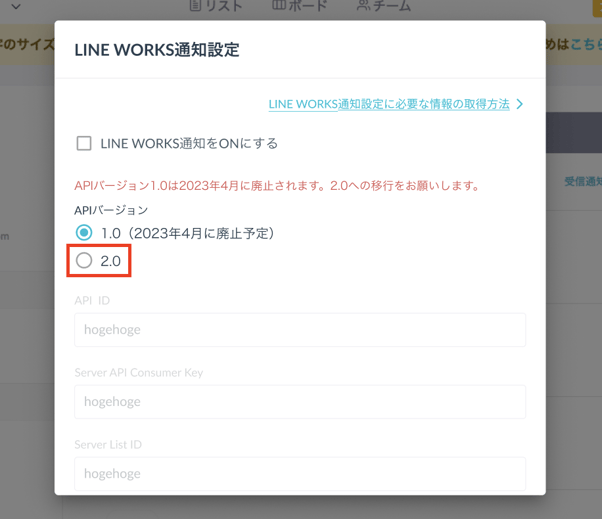
3) After entering the required information* for notification integration, click the "Update" button.
*Please refer to the following section "How to obtain information required for API authentication".
Before obtaining the necessary information for integration
The following information is required for integration with LINE WORKS API Version 2.0:
- Client ID
- Client Secret
- Service Account
- Private Key
- Bot ID
- Channel ID
This FAQ explains how to obtain all of the above information. However, since the information is scattered, we recommend taking notes as you go along.
Please note that the above list of information corresponds to the order of entry in the formrun settings page, so feel free to copy & paste it for your reference.
You can obtain the information required for API authentication from the LINE WORKS Developer Console.
However, to use the LINE WORKS Developer Console, you must have one of the following authority settings. Please ensure that someone with the appropriate authority performs the settings.
- Super Administrator
- Sub Administrator
- Administrator with custom "Developers" authority
Accessing the LINE WORKS Developer Console
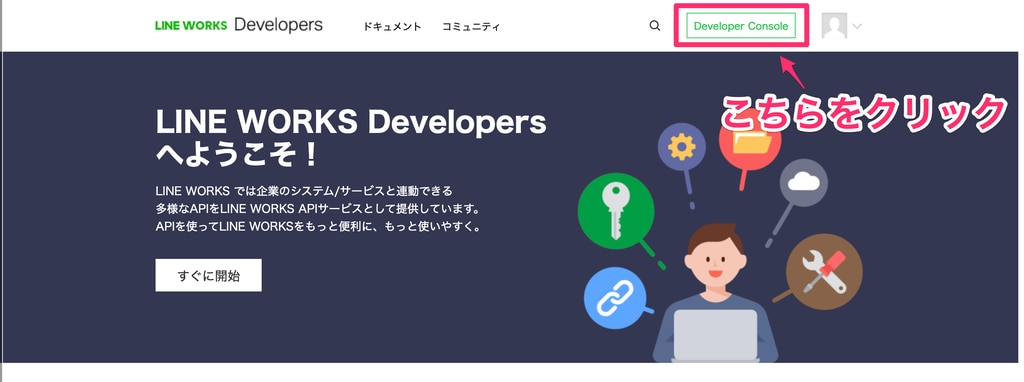
First, while logged into LINE WORKS, access the LINE WORKS Developers site. Click on "Developer Console" located at the top right of the site.
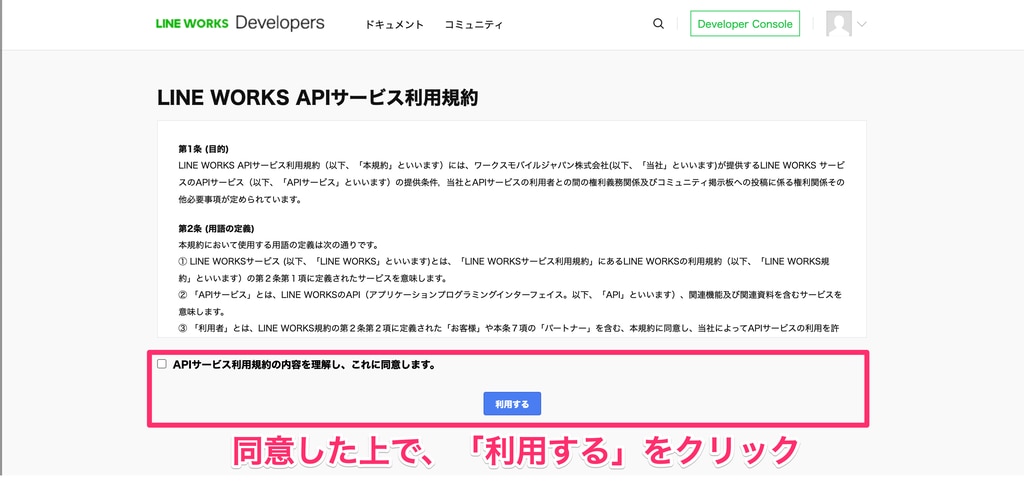
Agree to the terms and click on "Use".
You have now entered the LINE WORKS Developer Console.
Using LINE WORKS API 2.0
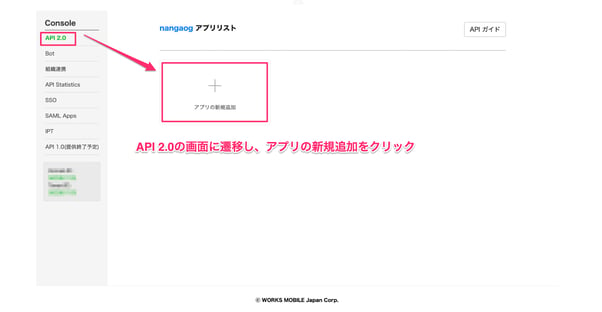
Navigate to "API 2.0" on the left sidebar and click on "Add New App".
Add a New App
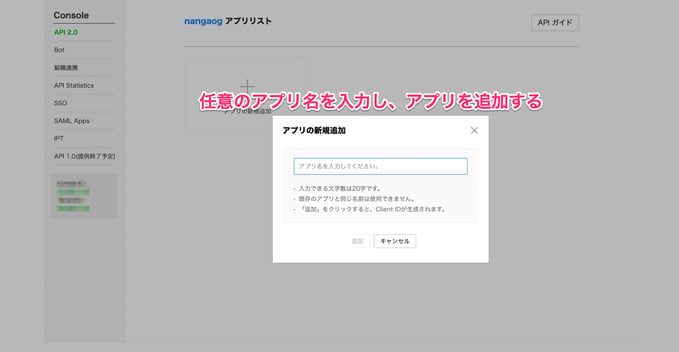
Enter a desired app name.
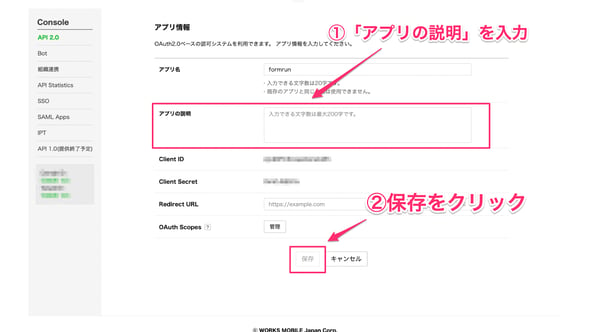
On the subsequent page, enter a description for the app and click "Save".
Check Client ID and Client Secret
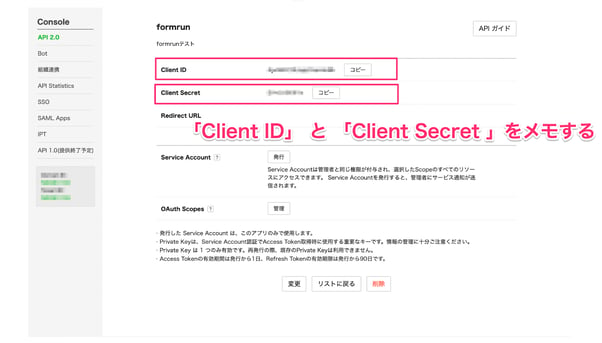
Once you save the "App Information", you can check the "Client ID" and "Client Secret".
Issue Service Account

On the same page, by issuing a "Service Account", you can check it as well.
Issue Private Key
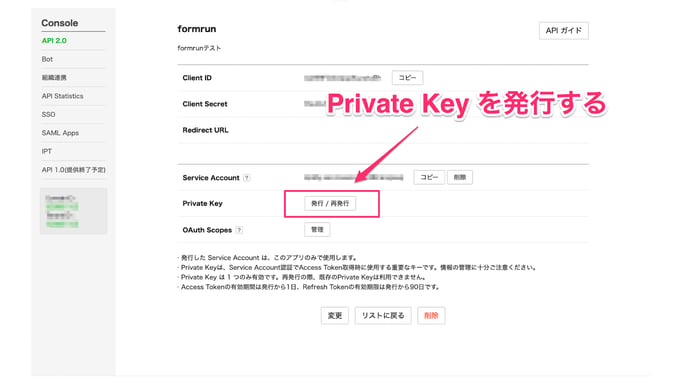

※ Please ensure the authentication key does not leak externally. If you lose the file or if the file is leaked, reissue a new authentication key from the reissue button.
※ For Windows, try the following steps:
1. Search for the downloaded file in Explorer
2. Right-click on the file
3. Select "Open with program"
4. Choose "Select another program"
5. Select "Notepad" and open the file
※ For Mac users, when clicking on a file, Keynote might pop up with an "Invalid file format" message. If this happens, please try the following steps:
1. Search for the downloaded file in Finder
2. Right-click on the file
3. Choose "Open with" > "Other"
4. Select "TextEdit" from the "Applications" list
5. Click "Open"
Setting up OAuth Scopes
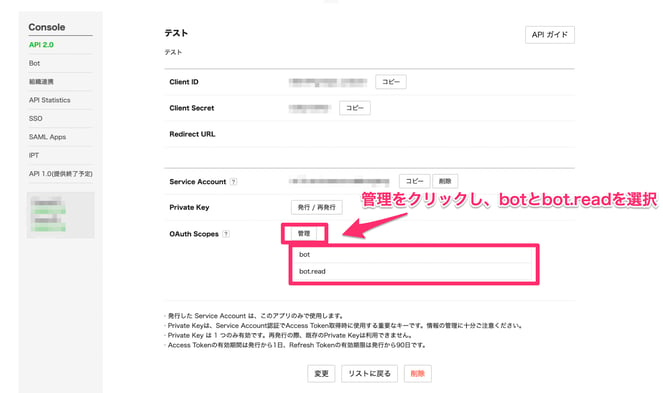
Click on "Manage" under OAuth Scopes, and from the options displayed, please select "bot" and "bot.read".
Once it matches the pageshot, your setup is complete.
We use a Bot for notification integration with LINE WORKS.
This will explain everything from registering a Bot to obtaining its ID and its invitation process.
Registering a Bot
Bot registration is done through the LINE WORKS Developer Console.
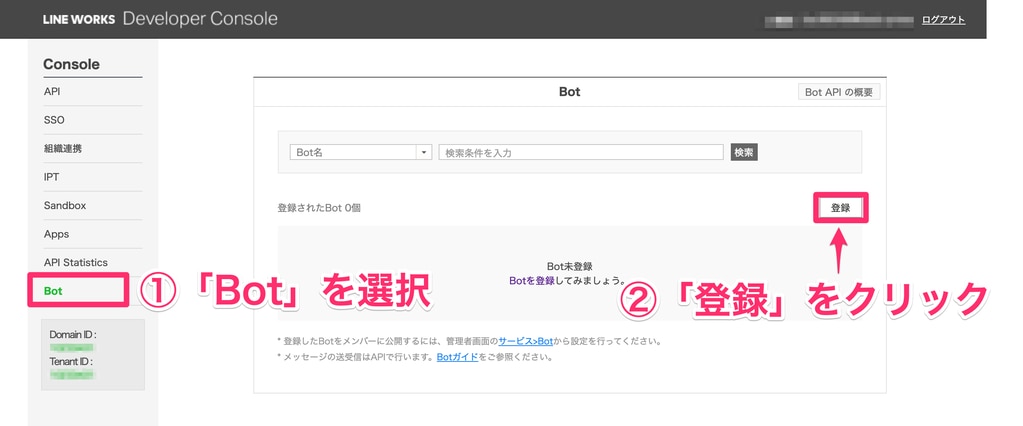
From the left sidebar of the LINE WORKS Developer Console, select "Bot".
Then, click "Register" to move to the registration page.
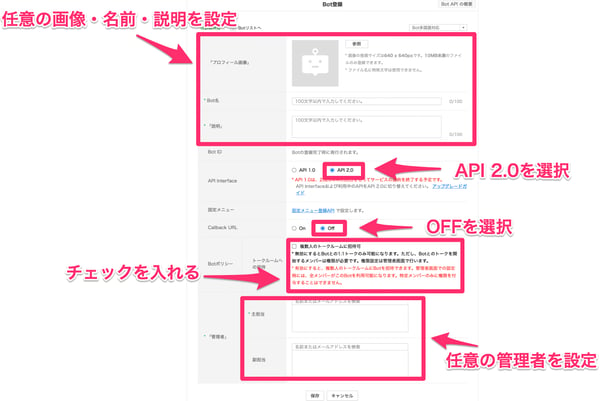
On the Bot registration page, enter the Bot's details.
You can freely set the following fields. No matter how you set them, it would be better to make it clear what the purpose of the Bot is.
- Profile image
- Bot name
- Description
- Administrator (main & deputy)
Please set the other fields as follows:
- Set API interface to API 2.0
- Set Callback URL to OFF
- Check the checkbox for Bot policy
Confirm that all the Bot's information has been entered, then click "Save".
With that, Bot registration is complete.
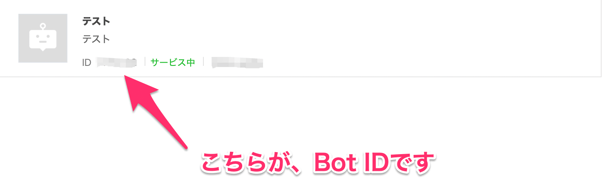
From the page displayed after Bot registration, you can check the Bot ID.
Publishing the Bot
In order to actually receive notifications from the Bot, you need to publish it.
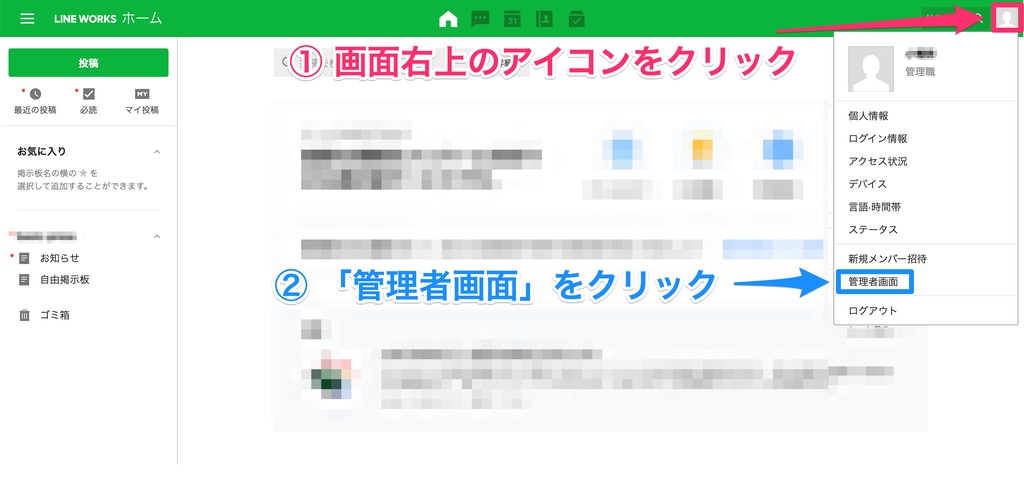
First, click on the icon at the top right of the LINE WORKS login page.
Then, select "Admin page" and move to the admin page.
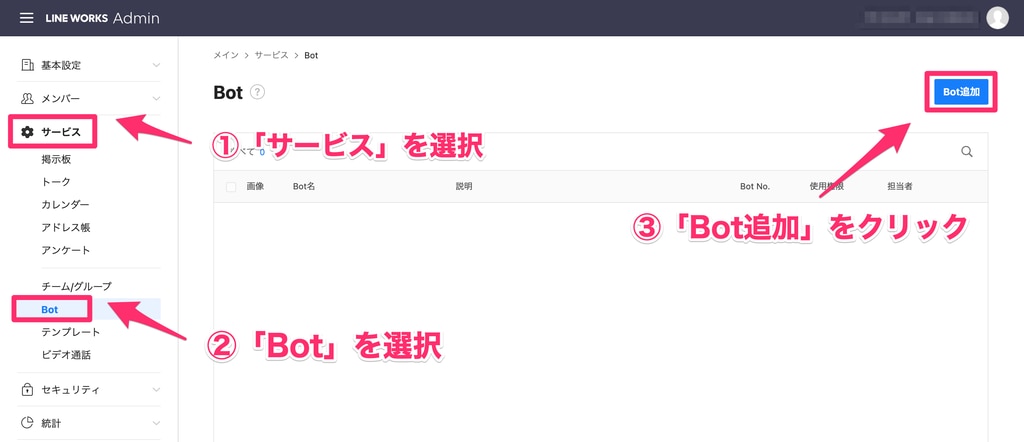
From the left sidebar of the admin page, select "Services" and then choose "Bot".
Press "Add Bot" at the top right of the page and add your Bot.
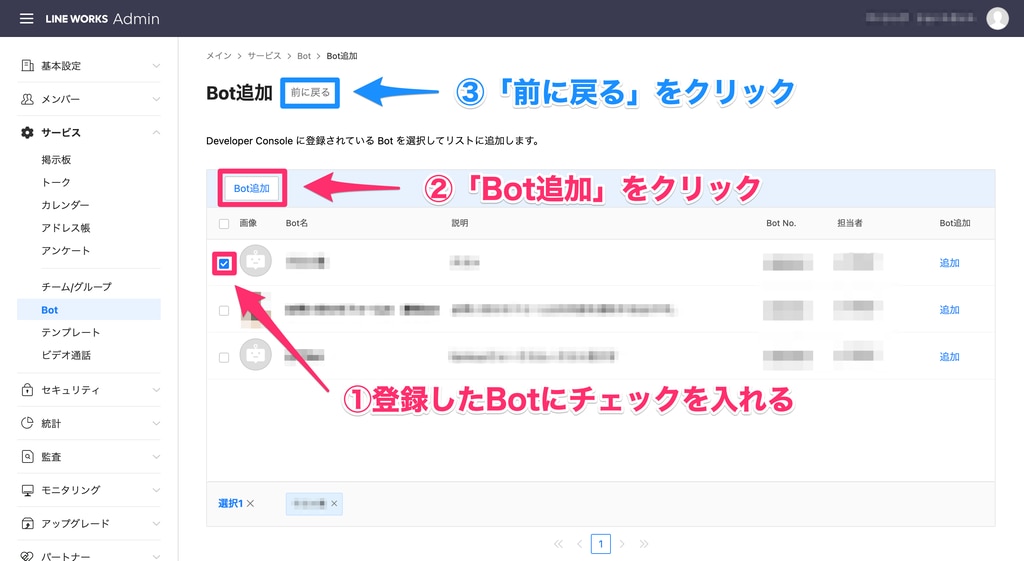
Select the Bot you registered on the LINE WORKS Developer Console and click "Add Bot".
Click "Go back" and return to the "Bot" page.
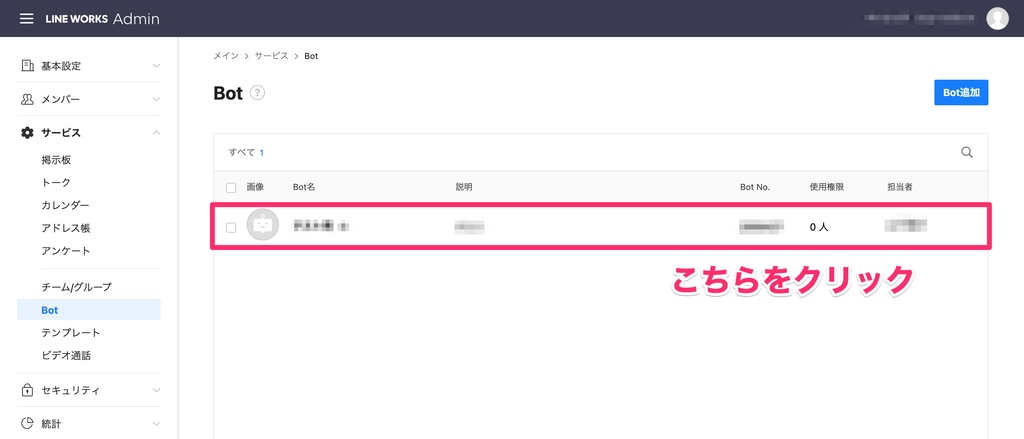
Click on the added Bot to open its details.
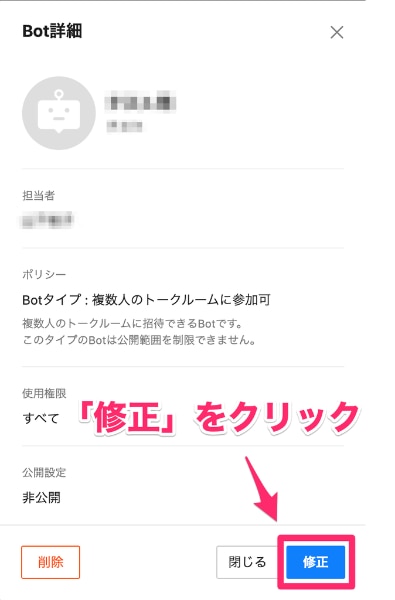
Click "Edit" at the bottom right.
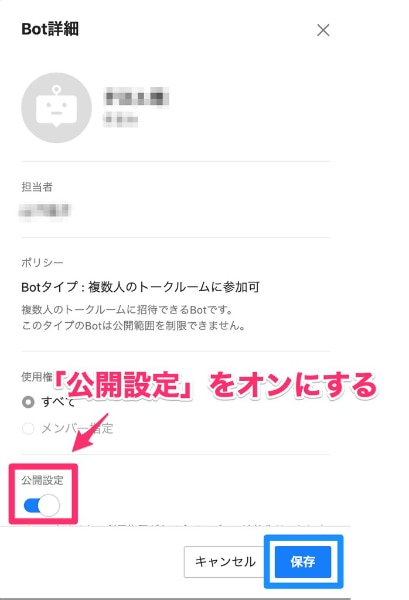
Turn on "Publish settings" and click "Save".
The Bot is now published.
Inviting the Bot to a desired chat room
Once the Bot is registered and published, invite it to the chat room where you want to receive notifications from formrun.
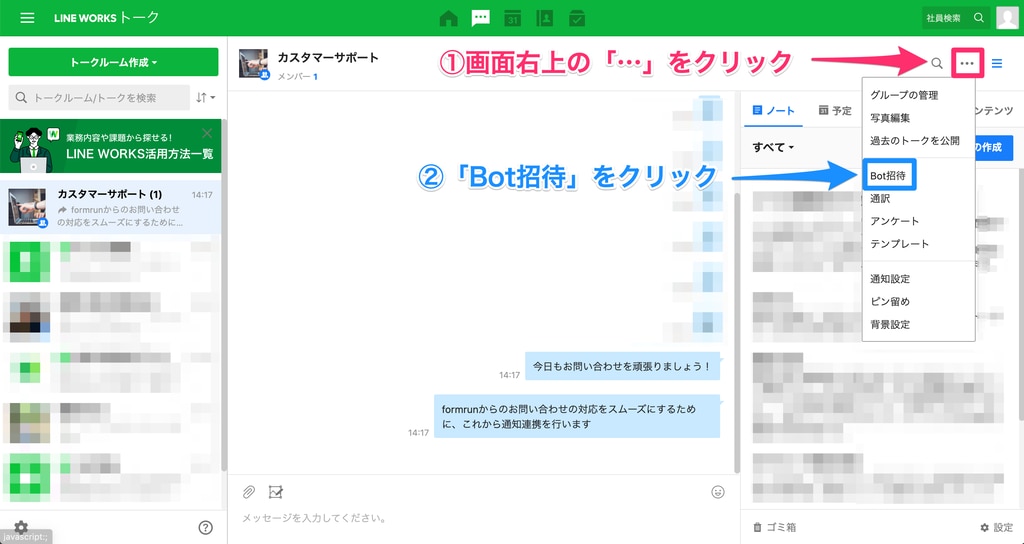
Click on "..." located at the top right of the LINE WORKS chat room page and select "Invite Bot".
※For 1-on-1 or multi-person chat rooms (excluding group chat rooms), choose "Invite" instead of "Invite Bot", then select the "Bot" tab on the displayed page to invite.
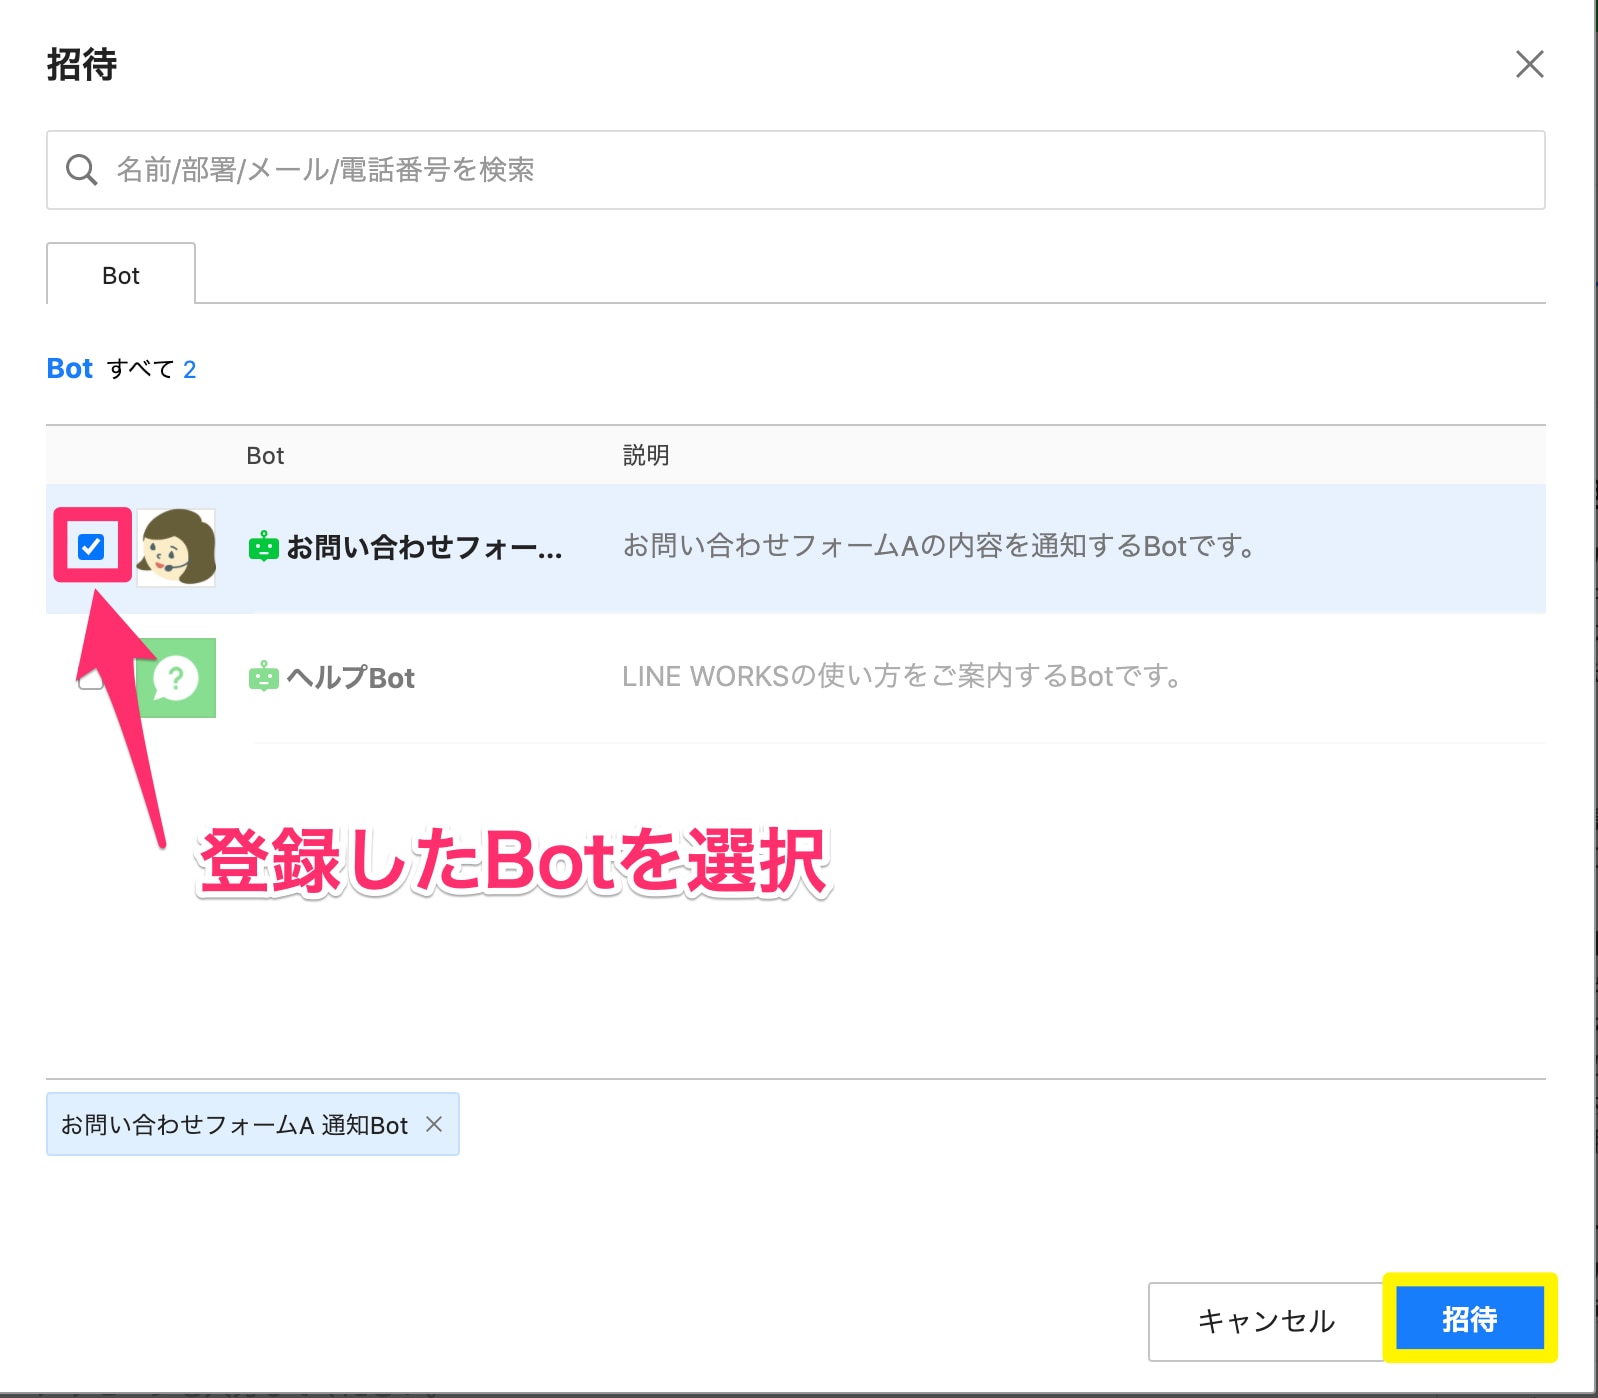
Select the Bot you registered and published for formrun integration and click "Invite".
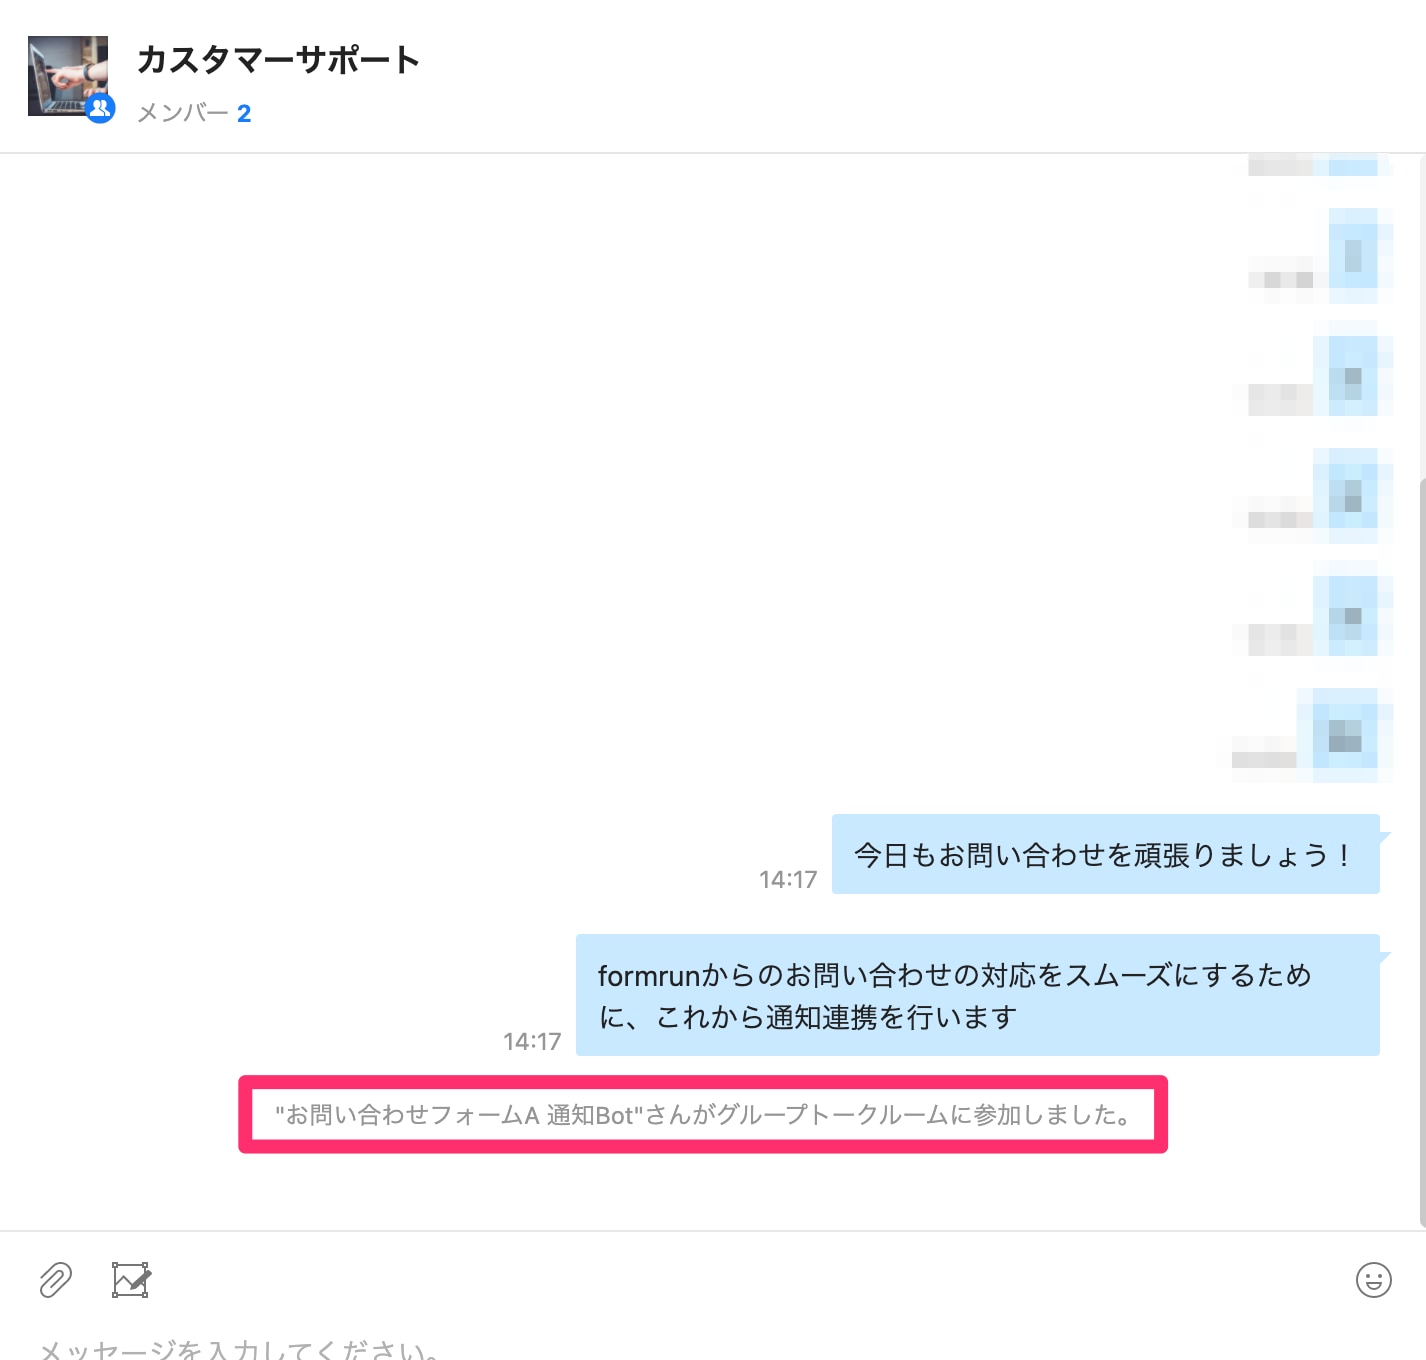
The Bot invitation is now complete.
Finally, obtain the ID of the chat room where you want to receive notifications from formrun.
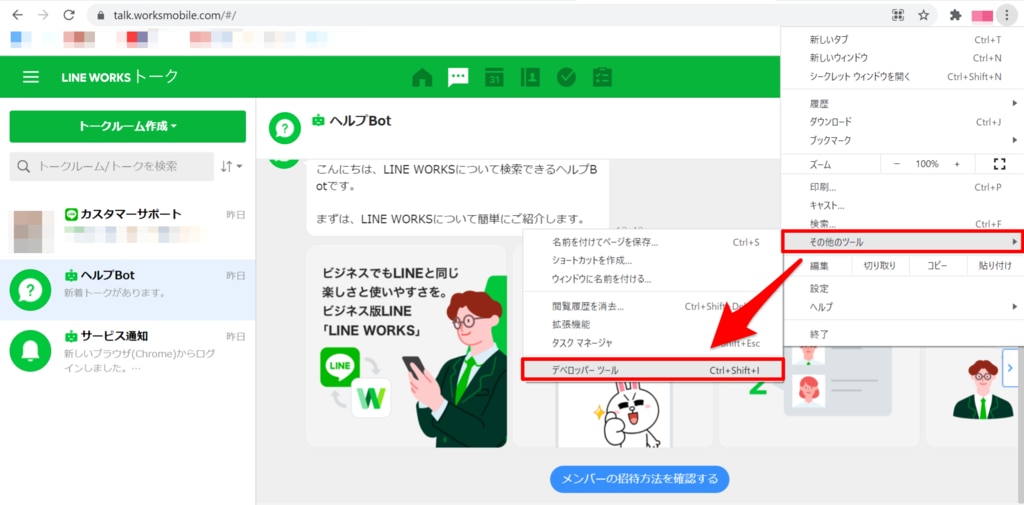
Open the LINE WORKS chat room in the Google Chrome browser.
Next, click on the "⋮" at the top right of the browser, then select "More tools" > "Developer tools".
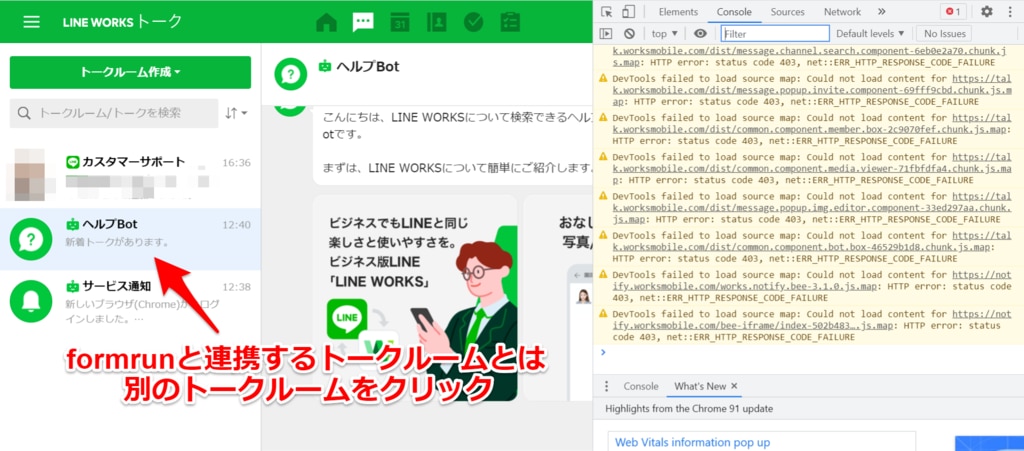
With the tool open, first click on a chat room different from the one you want to integrate with formrun.
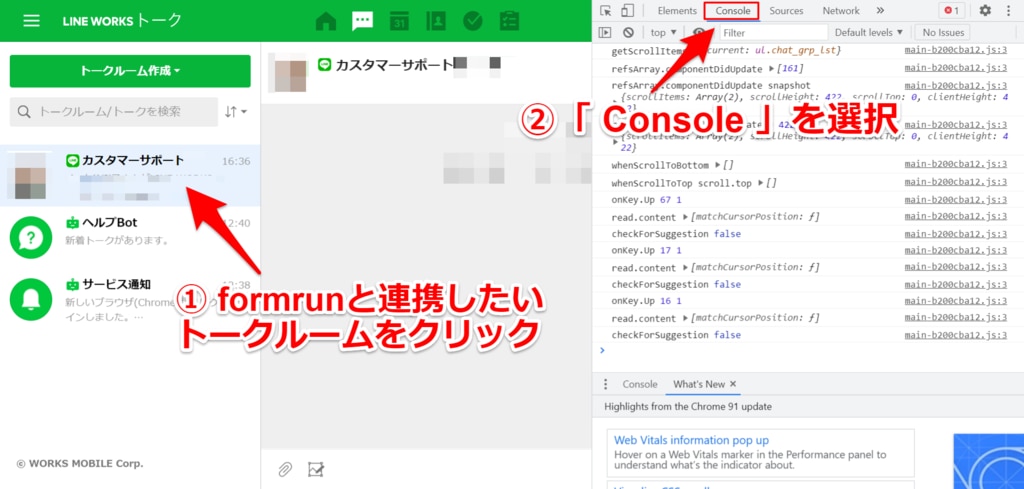
Next, click on the chat room where you want to receive notifications from formrun, then select "Console " at the top right of the page.
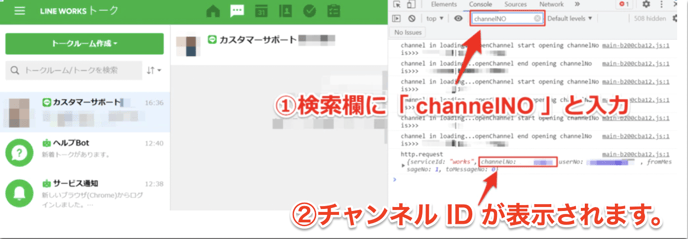
There will be a search bar labeled "Filter". Enter "channelNO" into it.
After entering, "channelNO: number" will be displayed. This number part is the Channel ID.
※Please ensure to obtain the ID of the chat room where you want to receive notifications from formrun.
※If you have completed the integration but are not receiving tests, there might be an error in the Channel ID.
Please check carefully and re-enter.