-1.png?height=120&name=formrun_logo%20(3)-1.png)
How do I create a single email?
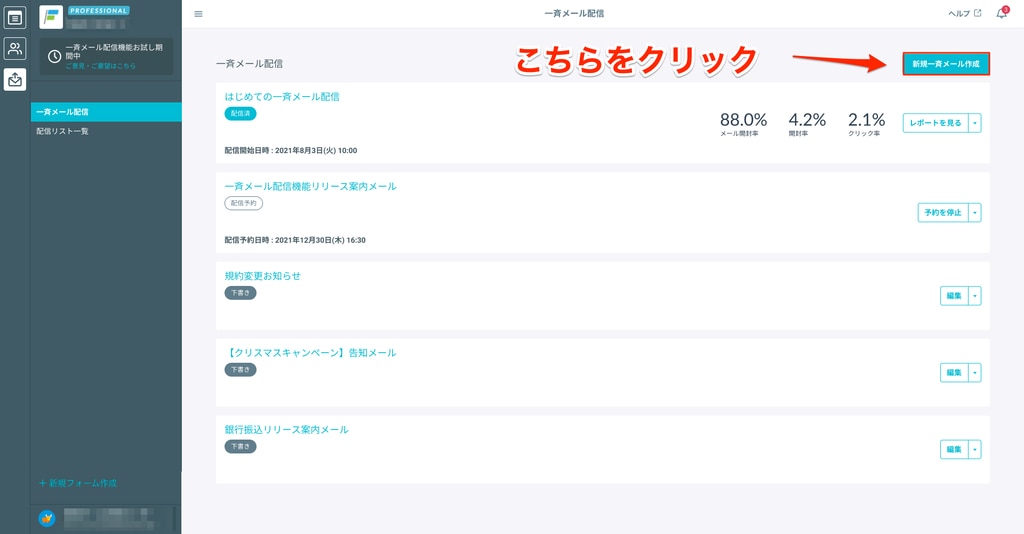
To access the Bulk Email Creation Page, click the "Create New Bulk Email" button in the top right corner of the Bulk Email Distribution page.
Edit the following to create your email:
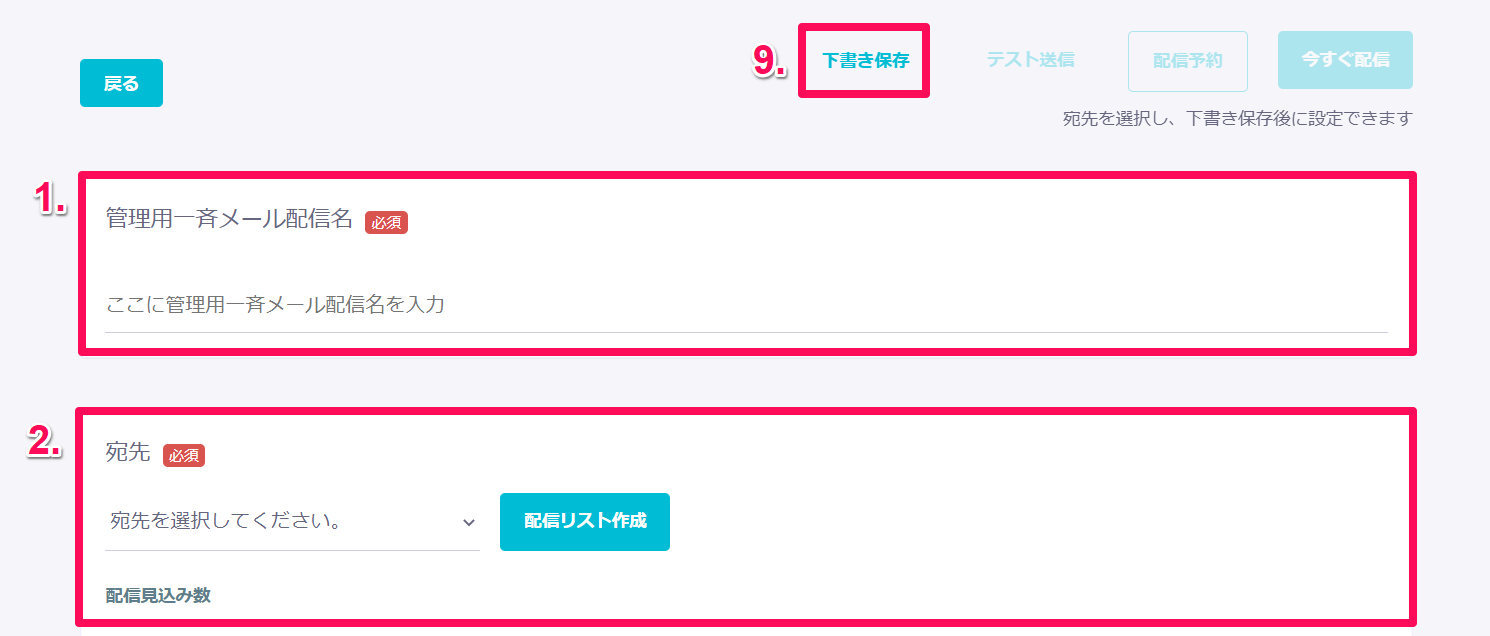
- Bulk Email Name (for administrative use)
- Recipients (select from distribution lists)
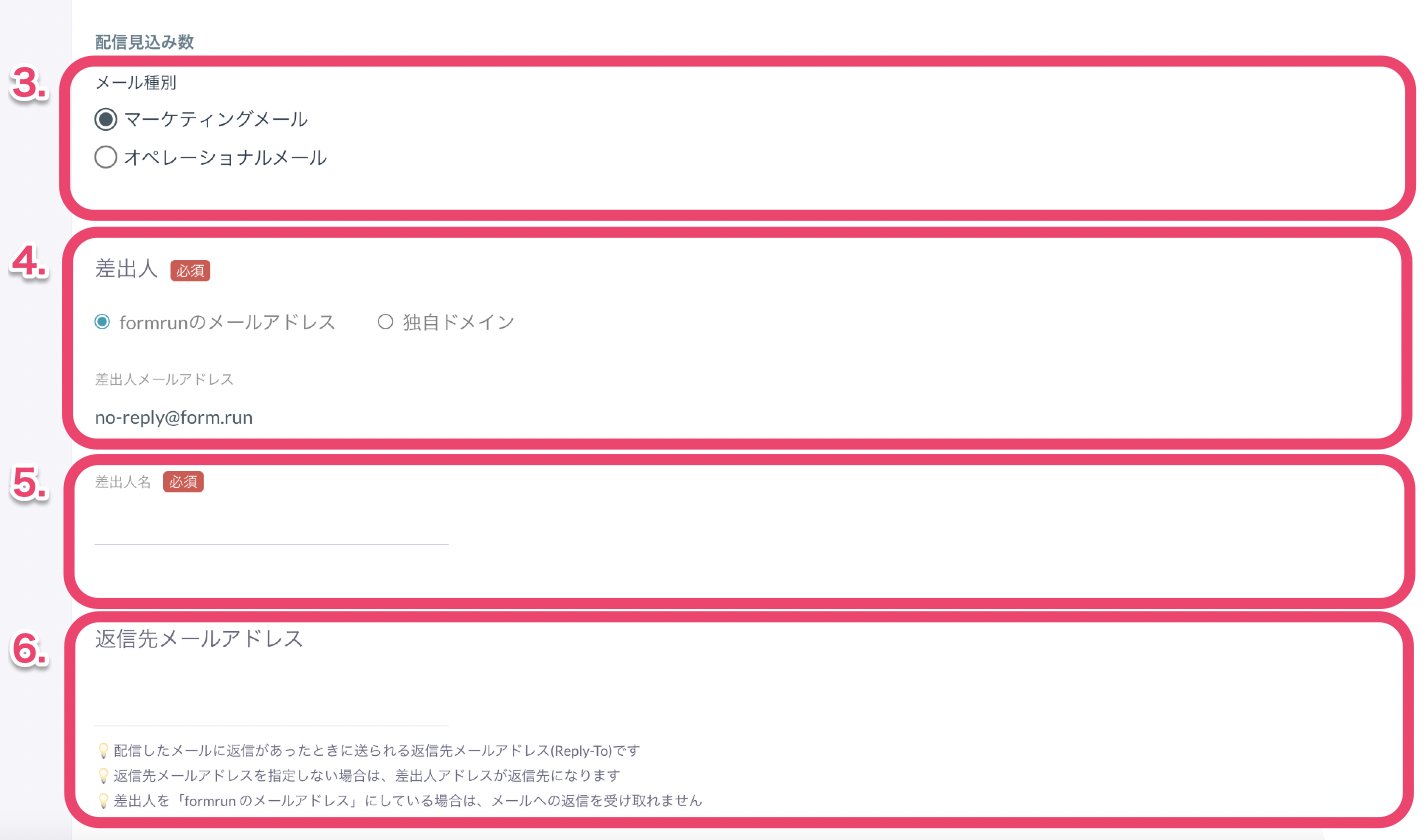
- Email Type
- Sender Email Address
- Sender Name
- Reply-To Email Address
- Subject
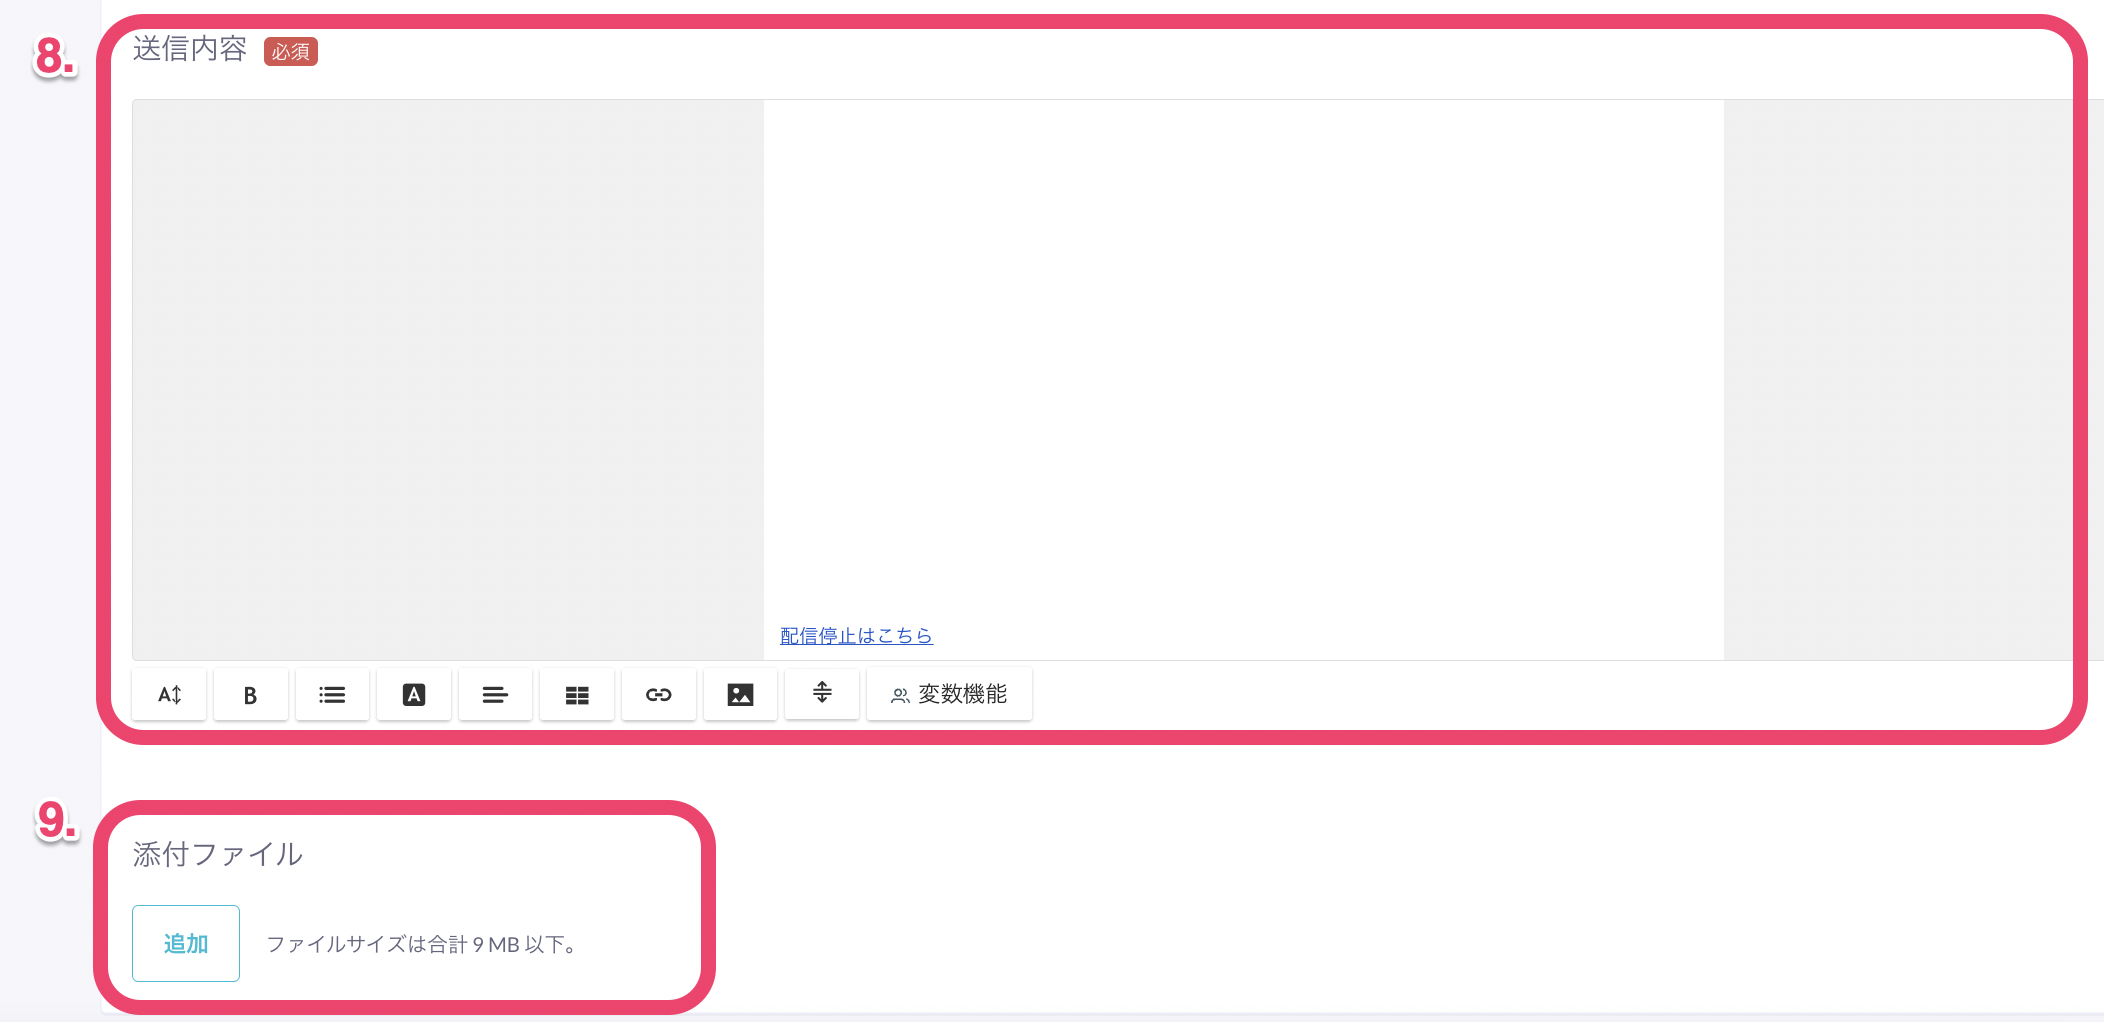
- Email Content (the content of the email to be sent)
- Attachments
- "Unsubscribe" Link Design
- Save Draft
3. Email Type (メール種別) has two options:
・ Advertising Email (広告宣伝メール)
・ Operational Email (オペレーショナルメール)
《Advertising Email》
This type of email is defined by the Specific Electronic Mail Act. Specifically, it refers to "electronic mail sent by a sender who is an individual for the purpose of advertising or promoting business in cases where the sender is an organization for profit and conducts business."
《Operational Email》
Operational emails do not fall under promotional emails. Operational emails are sent even to customers who have opted out of receiving emails, and the "Unsubscribe" link is removed from the email content.
Operational emails can be sent to customers who have opted out, so please carefully review the following conditions before sending:
・ Emails containing important information about services or products that need to be sent to all service users (excluding emails that contain advertising elements)
・ Emails containing information about transactions, contracts, account conditions, or functions
・ Emails for providing products or services as part of a transaction for which the email recipient has already given consent
※ For regular bulk email distribution, please select "Marketing Email".
4. The Sender Email Address (送信元メールアドレス) must be either the form.run email address (no-reply@form.run) or a custom domain email address. If you choose a custom domain email address, you need to enter the email address before the "@" symbol.
6. By setting the Reply-To Email Address (返信先メールアドレス), the email recipient will reply to the designated address (Reply-To) when replying to emails sent by form.run. If you do not specify a Reply-To Email Address, the sender's email address will be used as the Reply-To address. However, if you have set the sender's email address to "form.run's email address," you will not receive email replies from end users, so please be aware of this.
▼Important Note
If you want to select a custom domain email address as the Sender Email Address, you need to set up the custom domain email address in advance (PROFESSIONAL plan only).
※ Teams that set up custom domain email addresses before July 19, 2021, will need to reconfigure them. For details, please refer to this page.
7. In the Subject (件名) and 8. Email Content (送信内容) fields, you can use variable functions. For more details on variable functions, please refer to this page. ※ Using variables, you can identify anonymous form respondents. Please refer to this page for setup instructions.

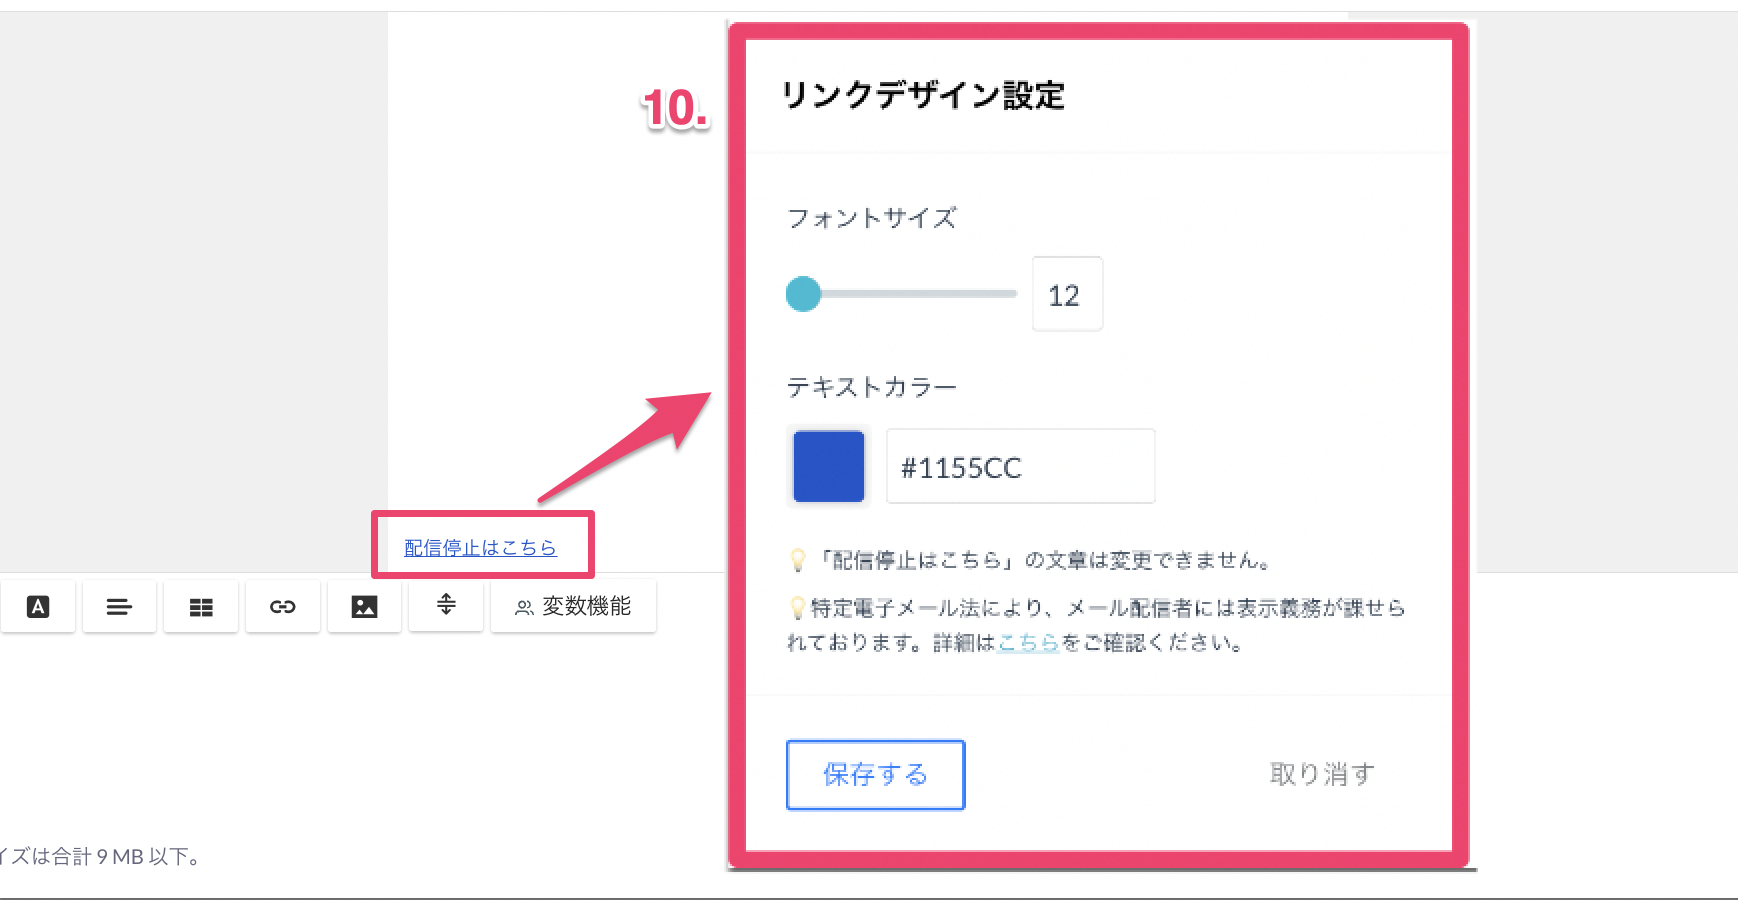
Regarding 10. (注意事項), you can change the font size and text color for the "Unsubscribe Here" link at the bottom of the email by clicking it. ※ The text "Unsubscribe Here" cannot be changed. ※ According to the Specific Electronic Mail Act, email senders have an obligation to display certain information, and hiding it is not allowed. For more details, please refer to this page.
Note that if you do not click the "Save Draft" button, you will not be able to click the "Test Send," "Send Now," or "Schedule Send" buttons.
Once you have completed the draft save, you can review the email content with a test send. The test send method is as follows: Click "Test Send" in the top right corner of the email creation page to display the modal below.
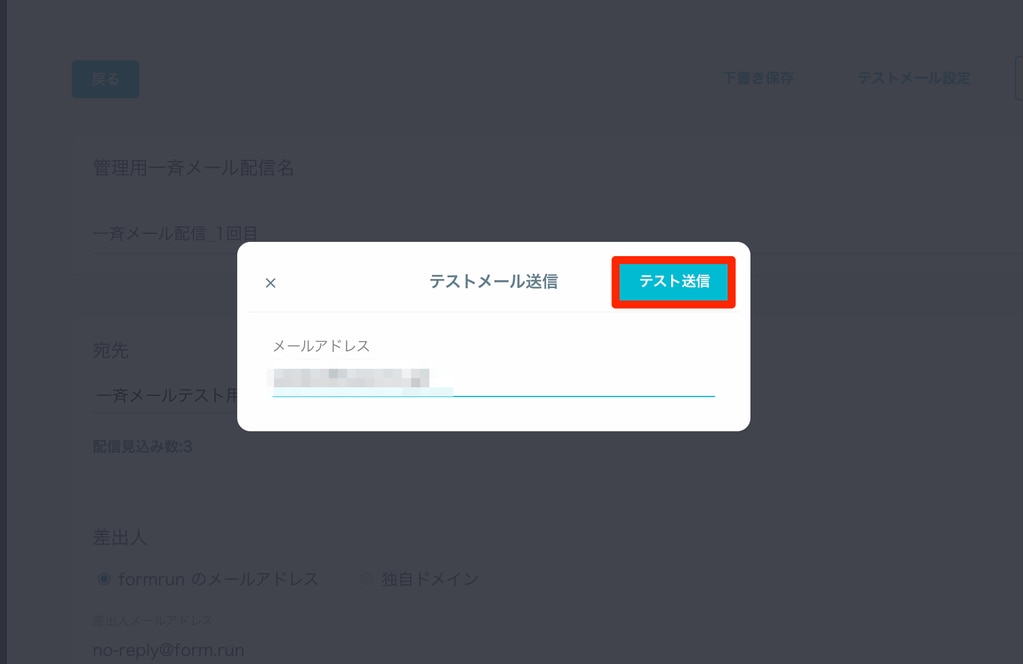
On the modal, enter the email address(es) to which you want to send the test email and click the "Test Send" button. The email will be sent to the specified email address(es). If you want to send the test email to multiple email addresses, please enter multiple email addresses separated by commas.
Additionally, the email address of the account that is performing the operation is automatically set in the modal.
If you need to interrupt the email creation process and temporarily save it, use the "Save Draft" button.